Set up your Nexxtap account in just a few easy steps to unlock the power of seamless transactions. This guide will walk you through every detail to help you get started quickly.
What is Nexxtap and Why You Need It?
Nexxtap is a powerful platform that facilitates seamless financial transactions for businesses of all sizes. It offers a user-friendly interface, real-time transaction tracking, and robust security features, making it a must-have tool for modern businesses. By using Nexxtap, you can streamline your transaction processes, reduce errors, and improve overall efficiency.
Nexxtap provides a centralised system for handling all business transactions. It can link multiple bank accounts and manage user permissions. Whether you own a small business or manage a large enterprise, Nexxtap can help you maintain control over your finances while providing your staff with the tools they need to perform their roles effectively.
For the video version or the onboarding process, click this link
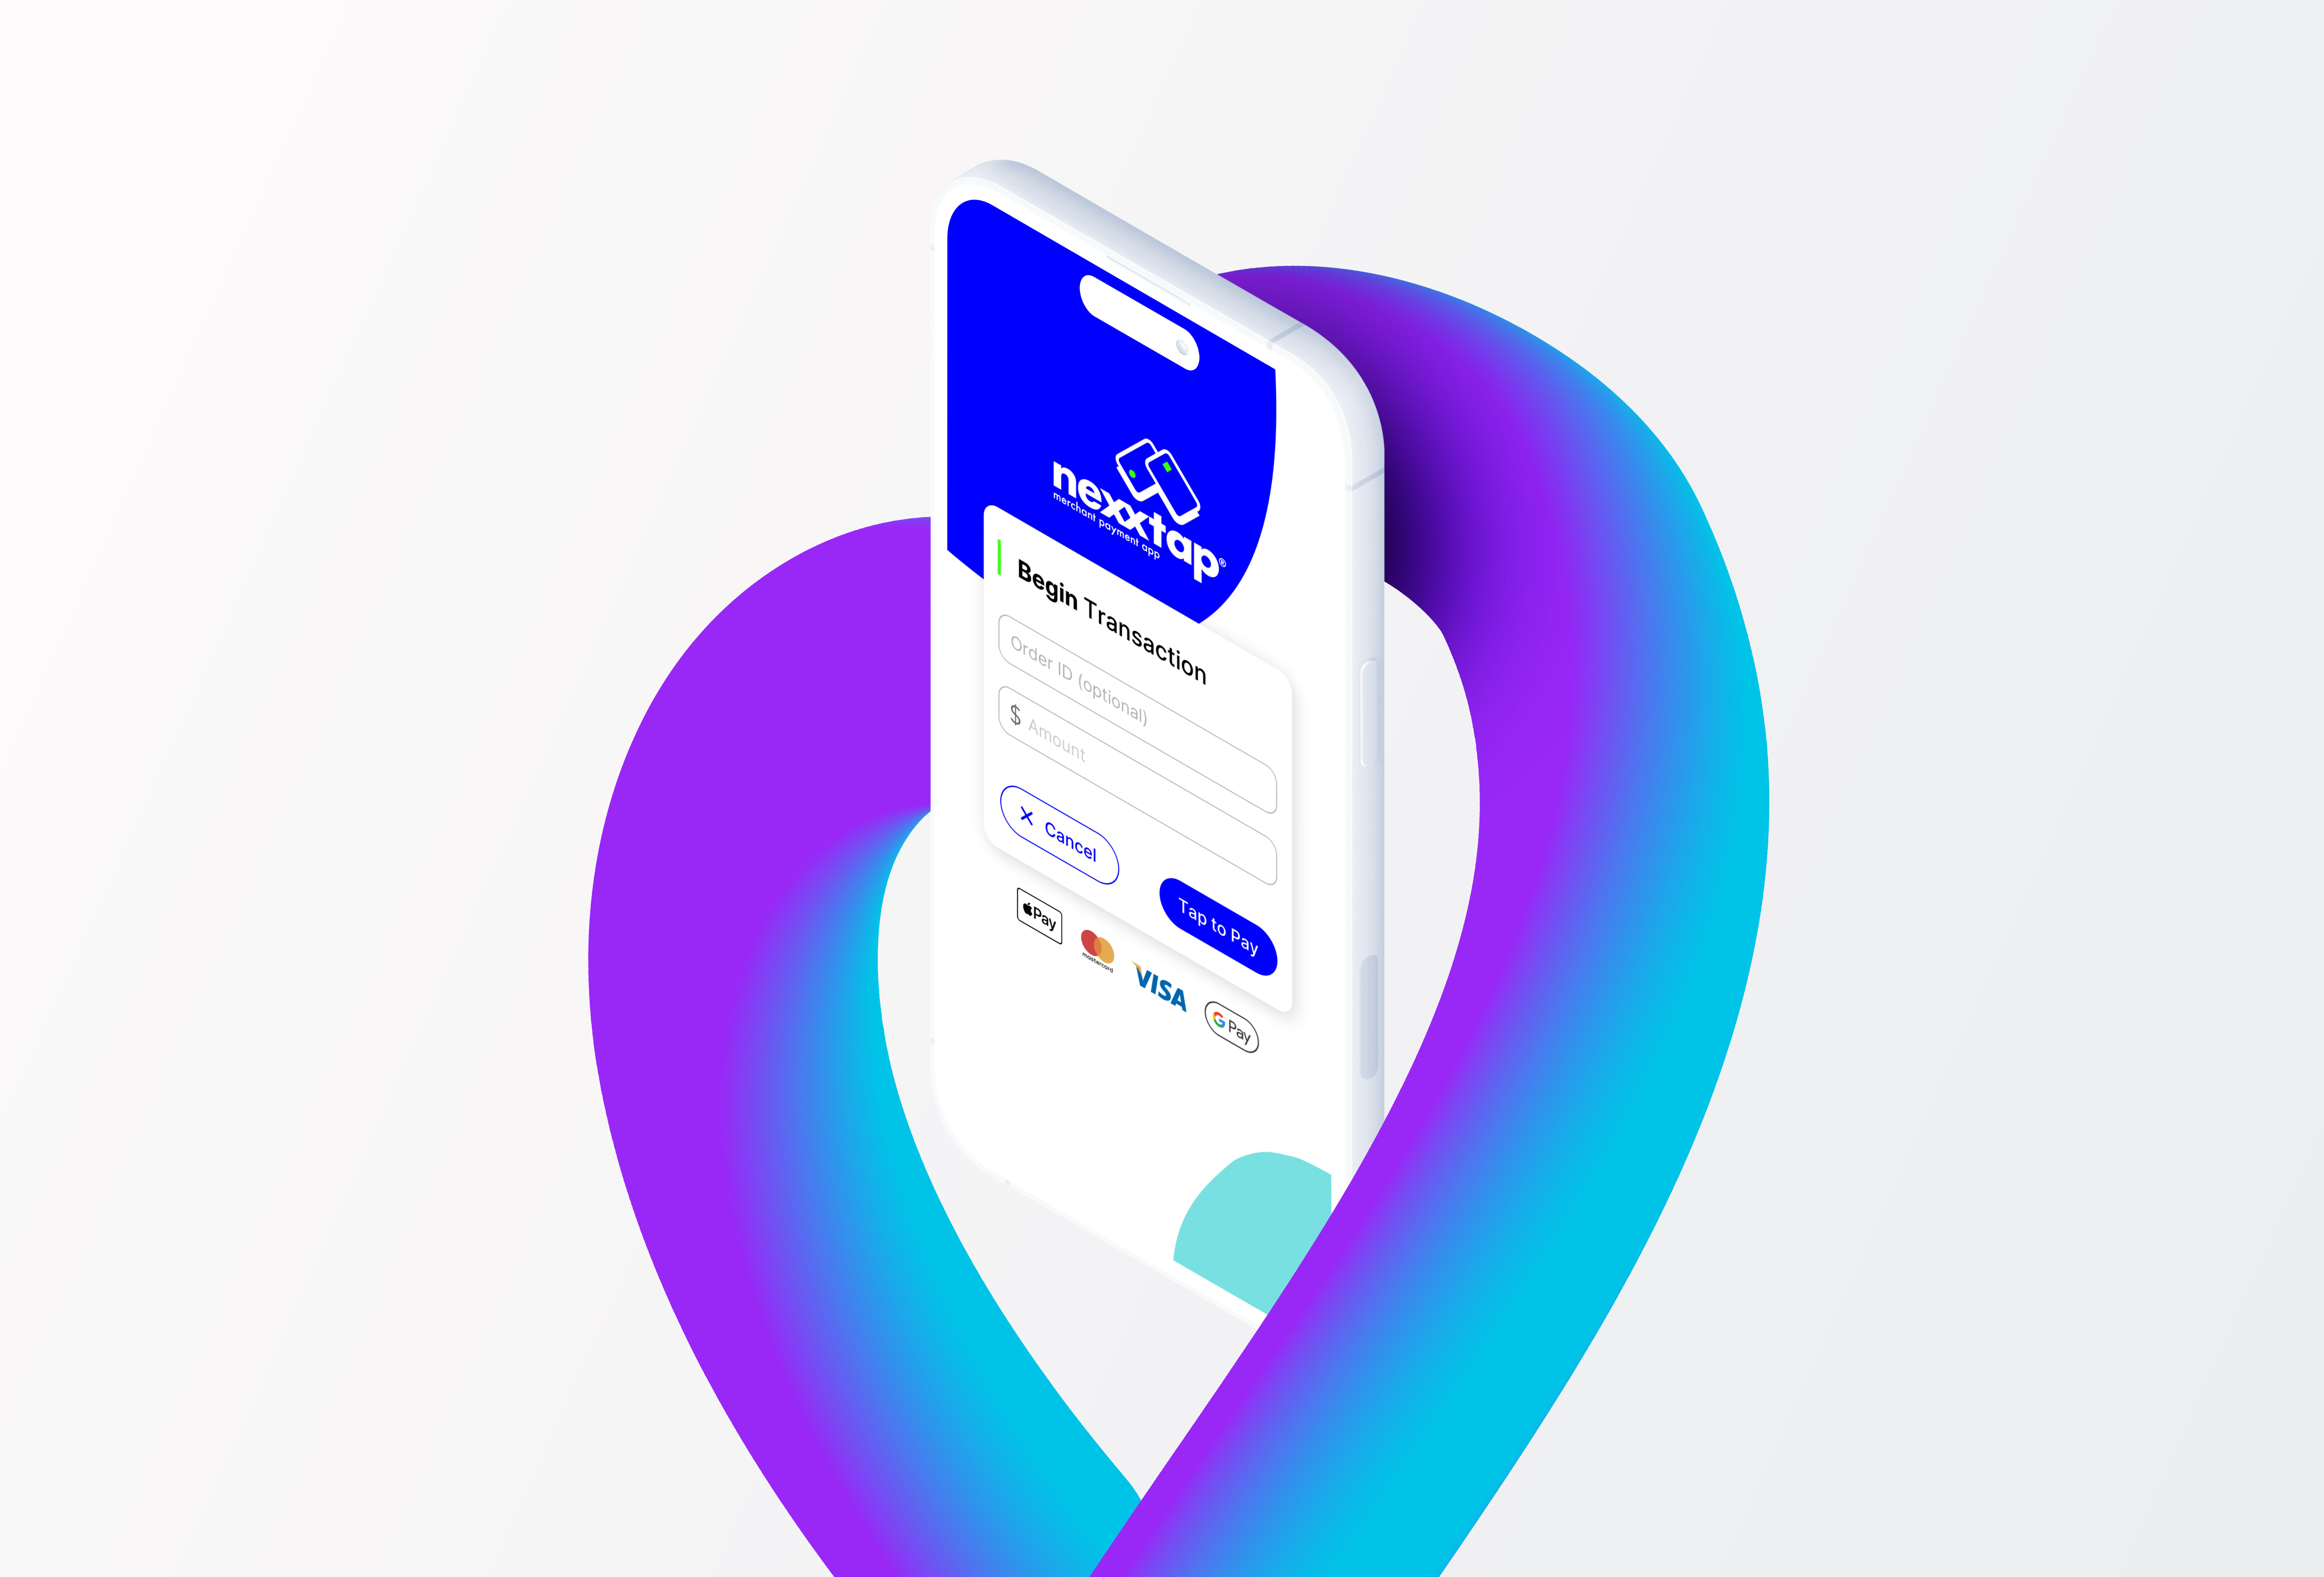
Creating Your Nexxtap Account: Step-by-Step Instructions
Step 1: Visit the Nexxtap Website
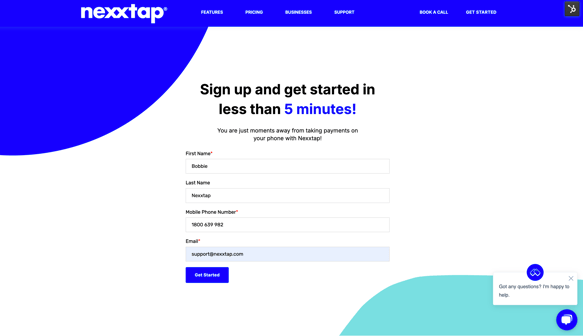
Step 2: Fill in Your Details
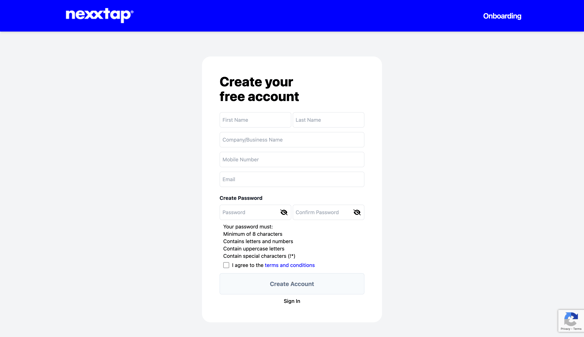
- After clicking Get Started, a registration form will appear.
- Enter the required personal and business details in the form.
- Once completed, click "Get Started" to submit your information.
- If prompted, complete any additional registration fields and confirm your details.
Step 3: Email Verification
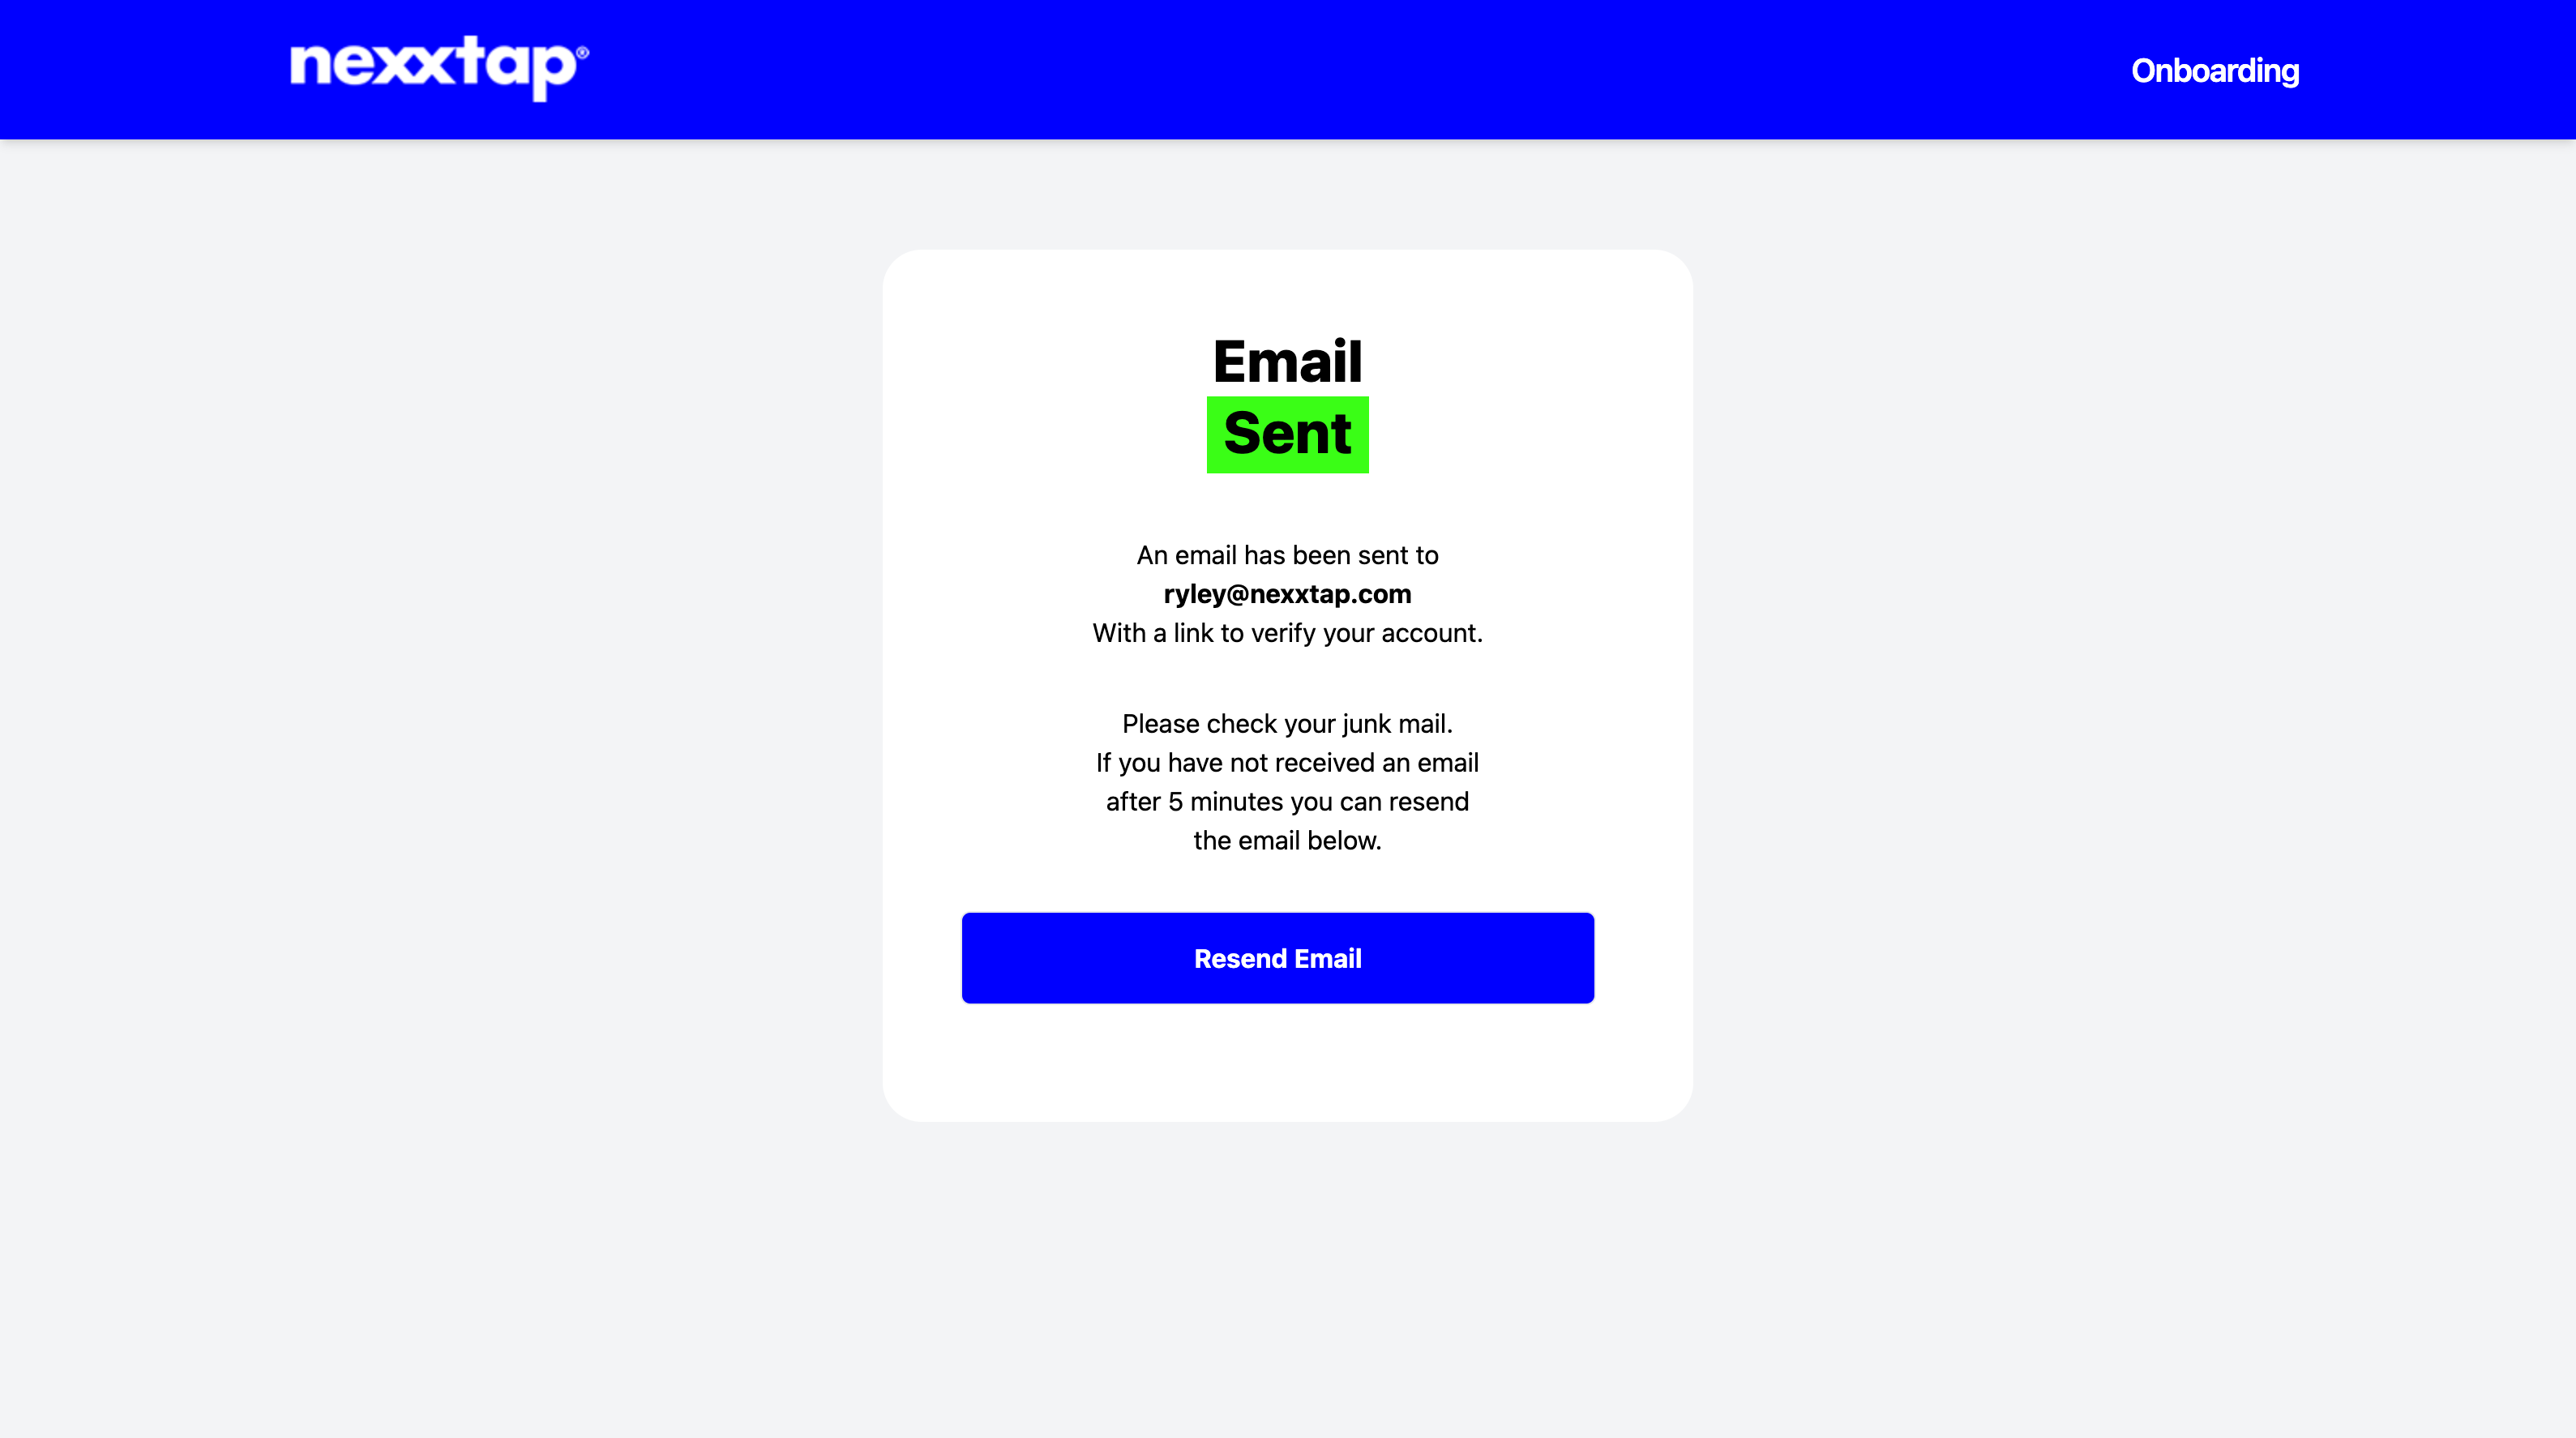
- You will receive a verification email at the address you provided during registration.
- Open the email and click on the link inside to confirm your email and complete the onboarding process.
Step 4: Collect Onboarding Documentation
- Once your email is verified, you will be guided to complete the onboarding document.
- Ensure you have all your business details handy, including your bank account details, ABN, and any other relevant information. Ensure that the documentation contains the same business name as the one listed on the application.
- These details are necessary to:
- Verify your business identity and ensure compliance with financial regulations.
- Ensure smooth payment processing and that funds are deposited into your nominated account.
- Provide required information for tax purposes and regulatory reporting.
- Review the form carefully, filling out all required sections.
- Agree to the Terms and Conditions provided in the registration process.
- Submit the document to proceed.
Please note all onboarding documentation steps are outlined below.
Following this process ensures a smooth onboarding experience and helps prevent unnecessary fund holds—an issue you may have encountered with other payment processors. Our detailed onboarding approach eliminates the need for such delays.
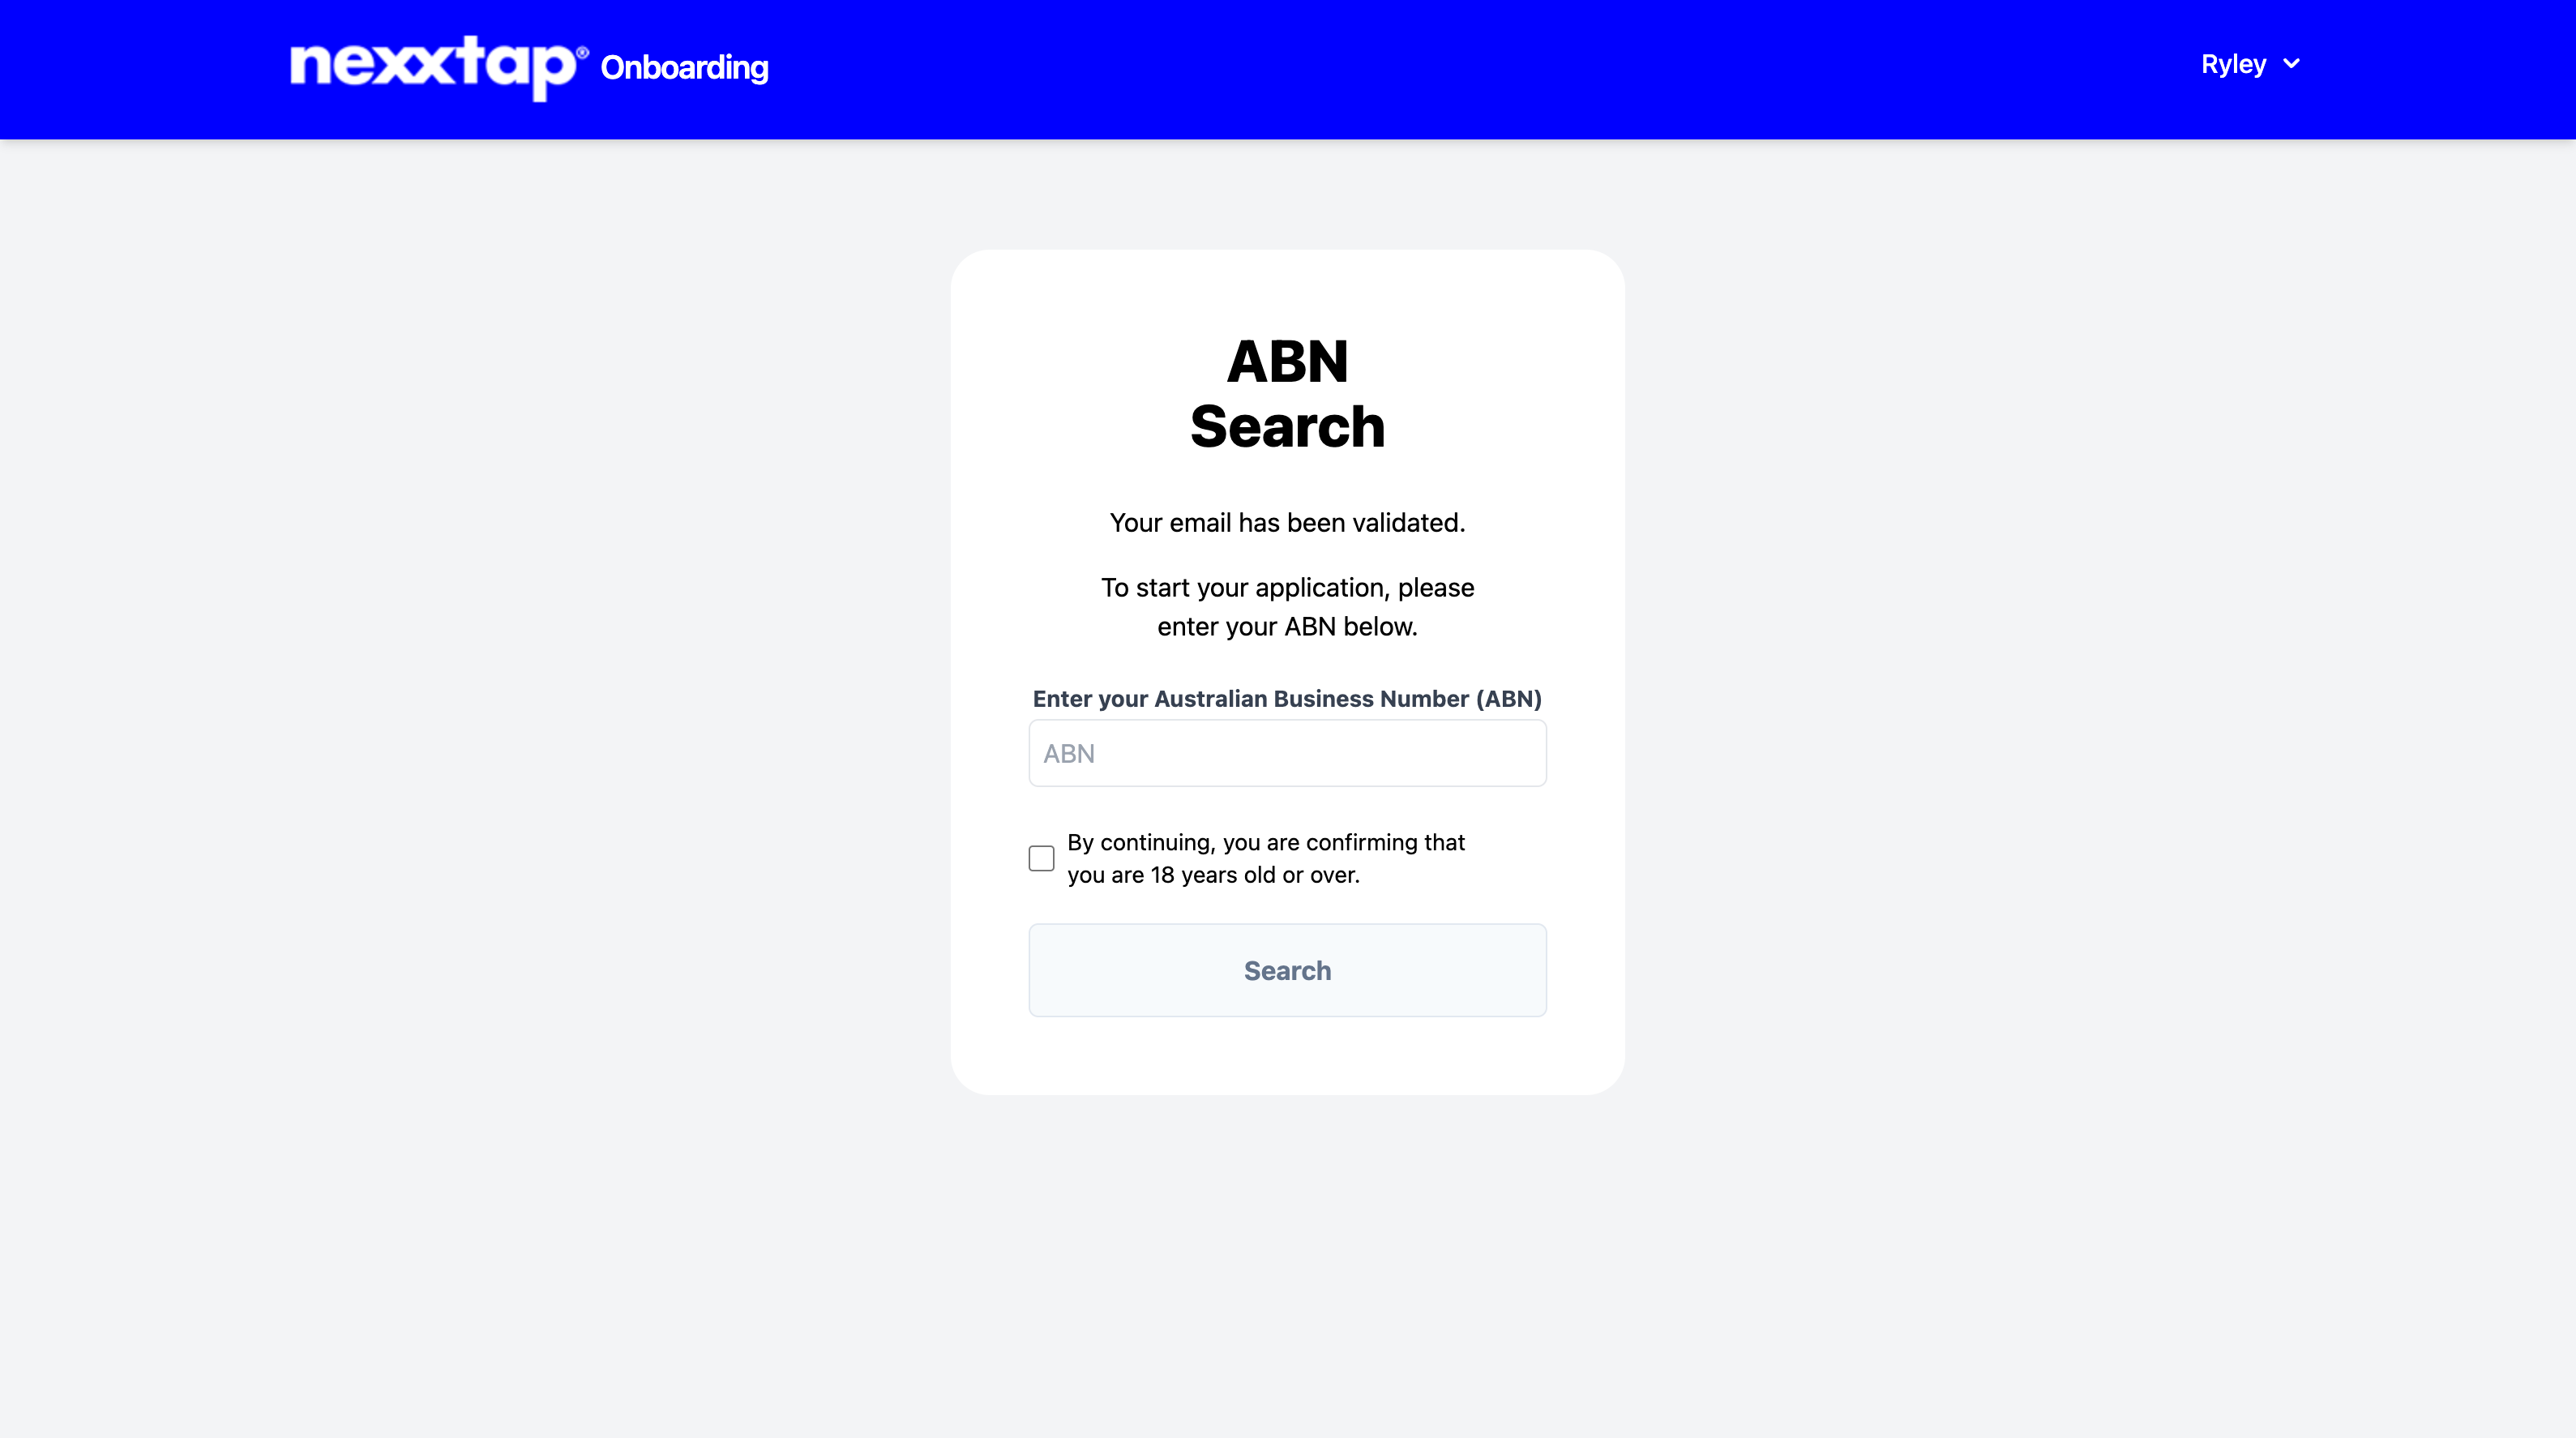
Step 5. ABN Search
Perform an Australian Business Number (ABN) search to verify your business credentials. This ensures your business is registered and eligible to accept payments through Nexxtap, maintaining compliance with regulatory requirements.
Step 6. Business Information
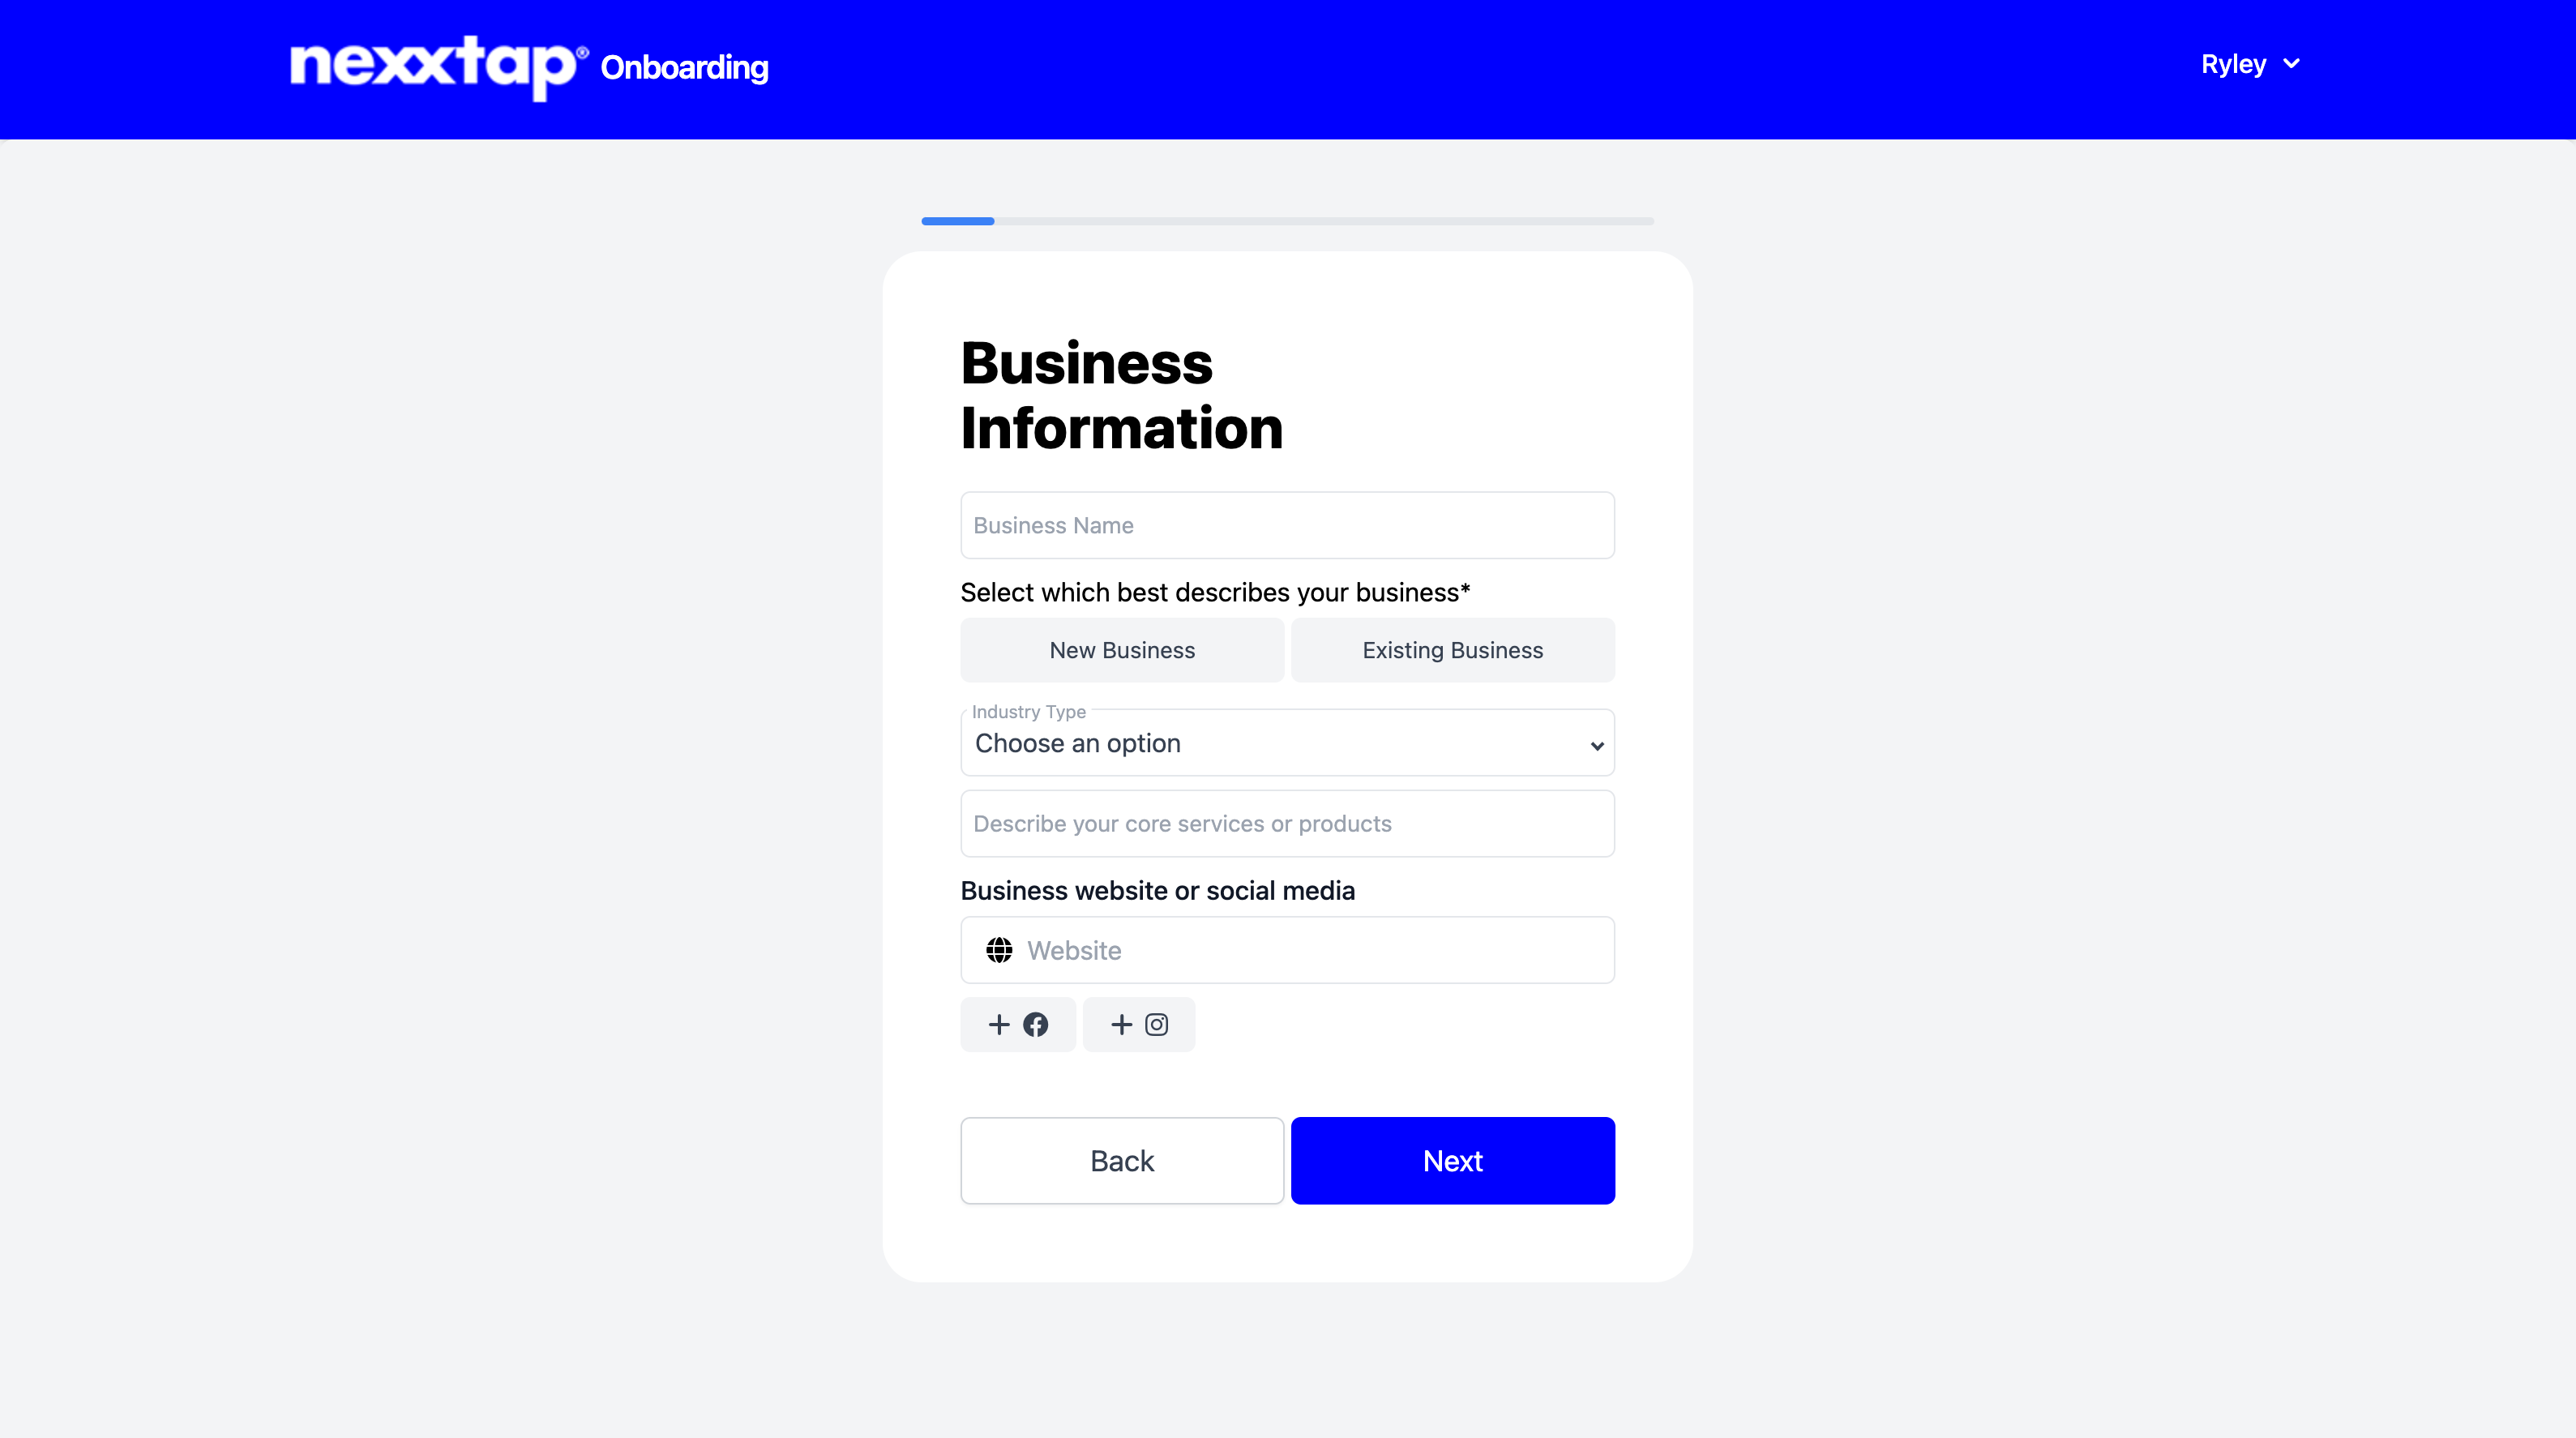
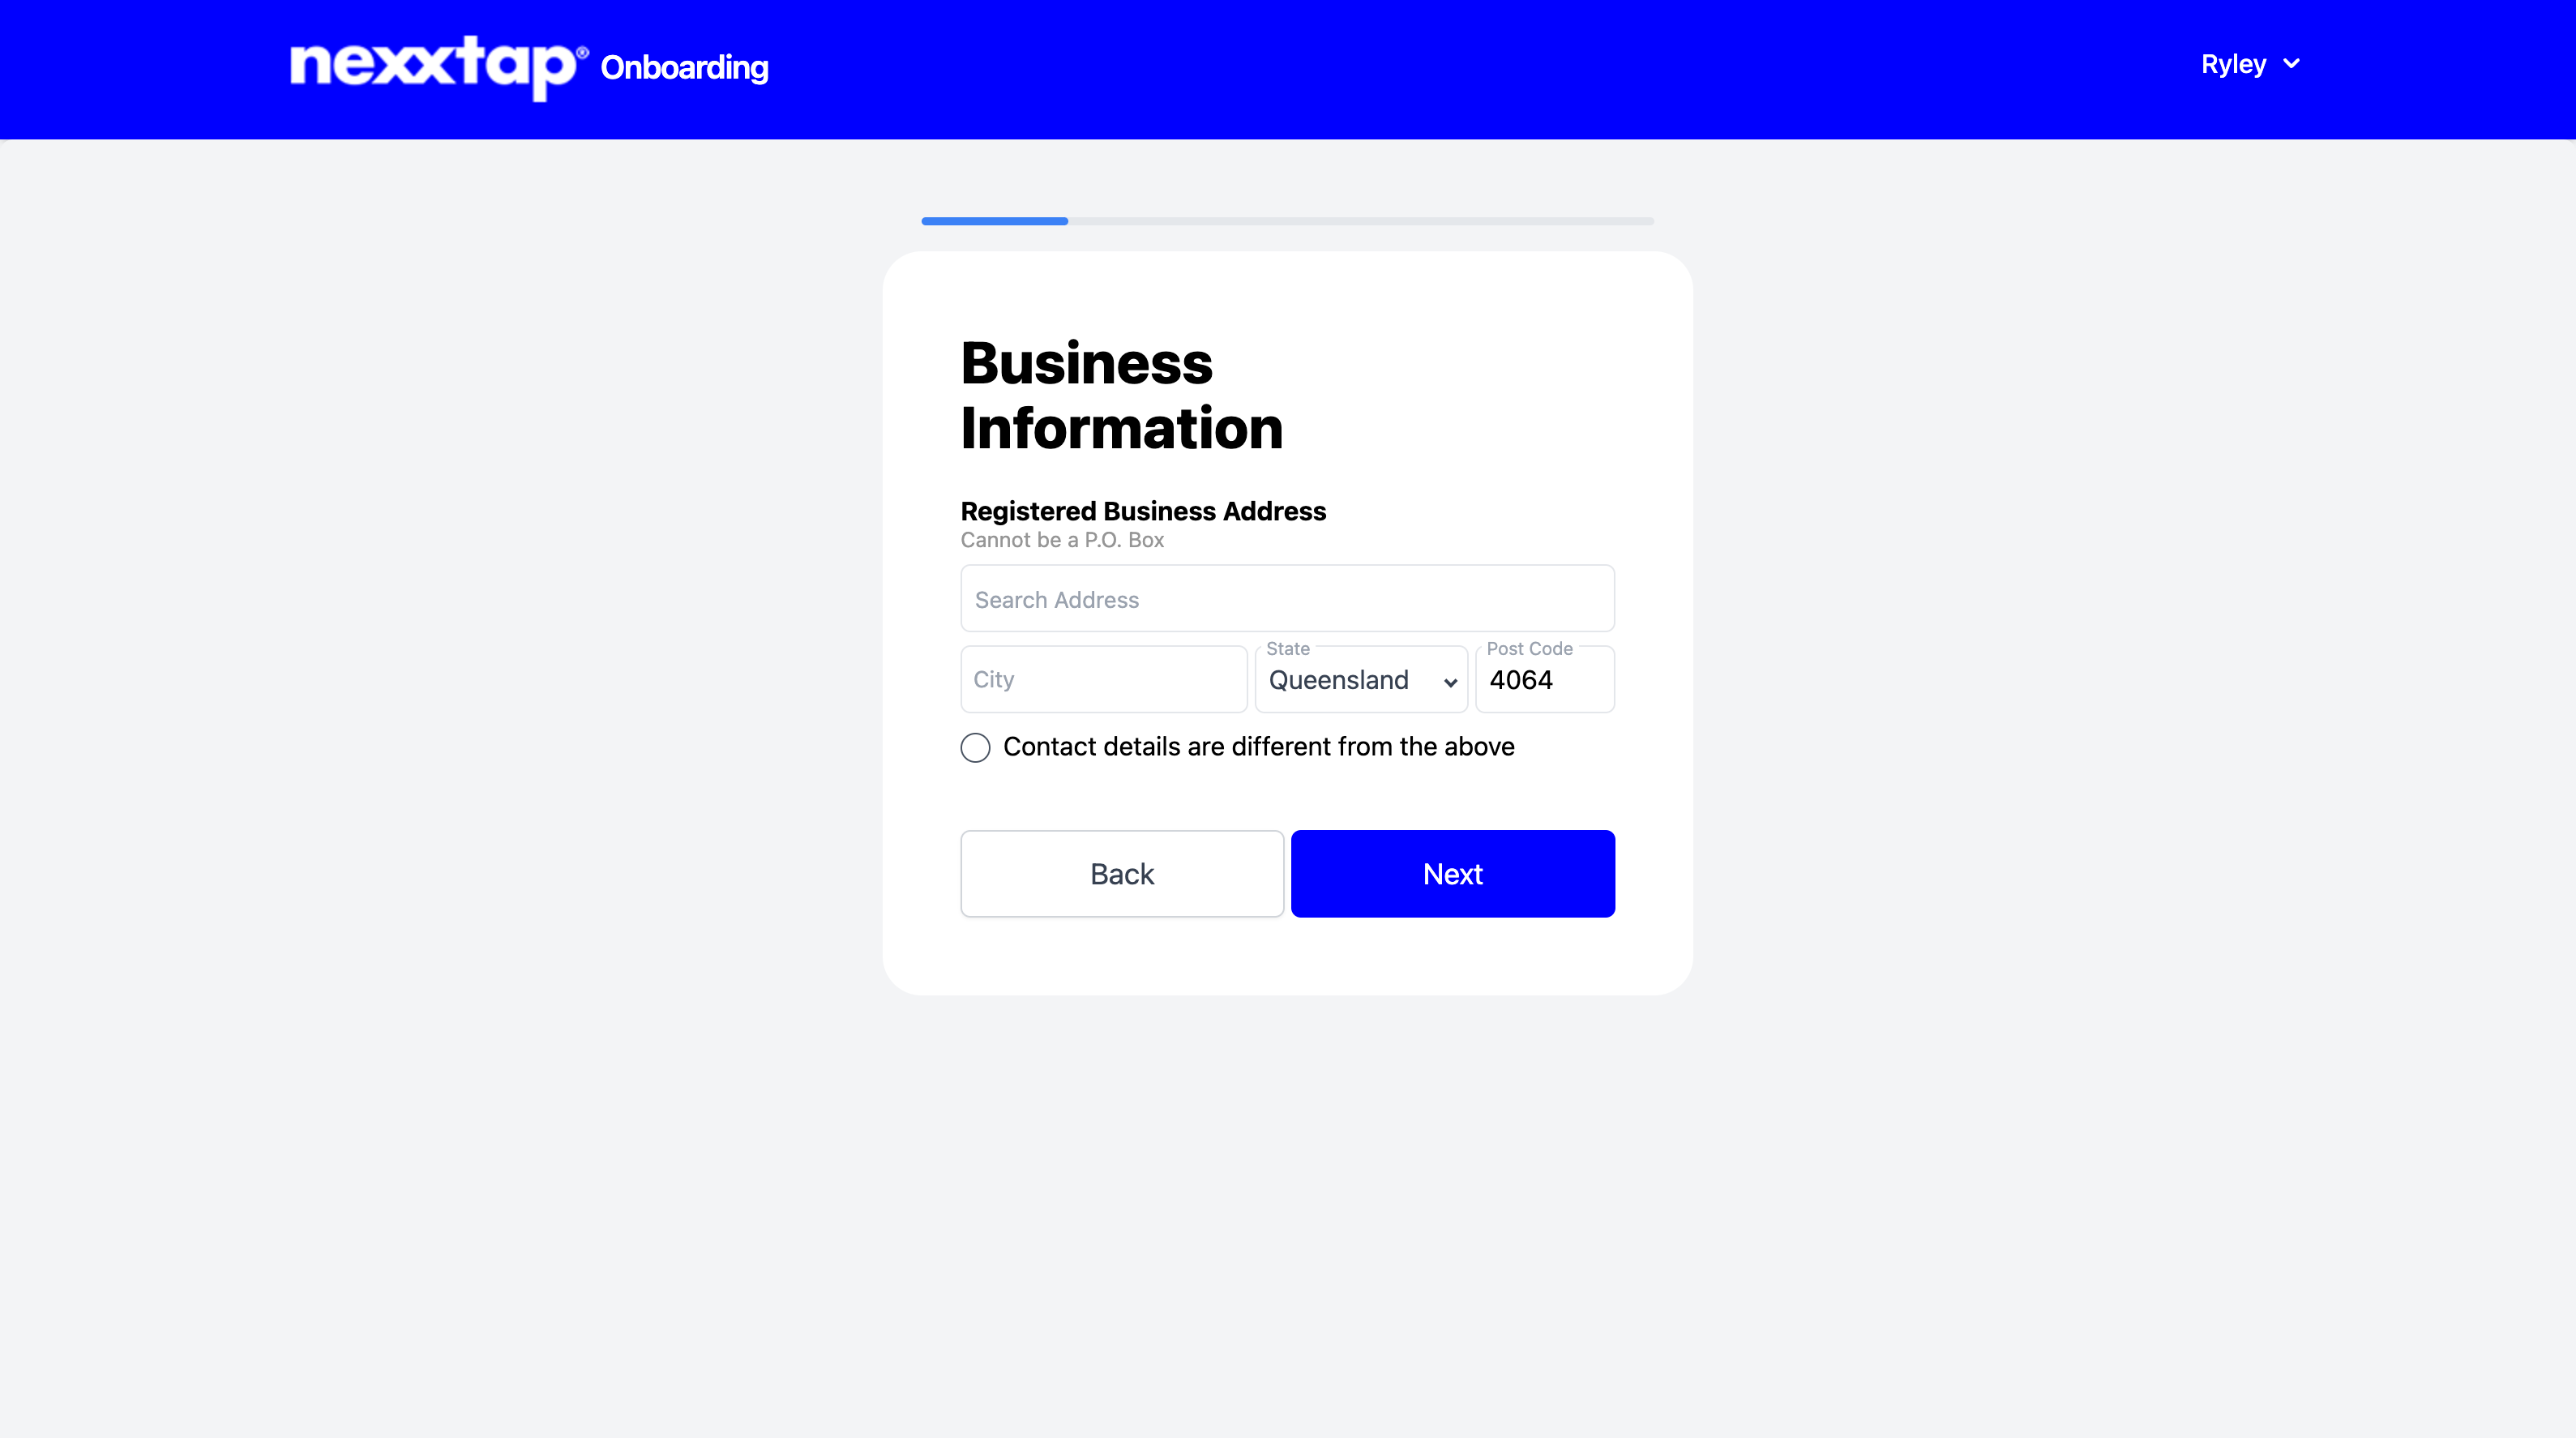
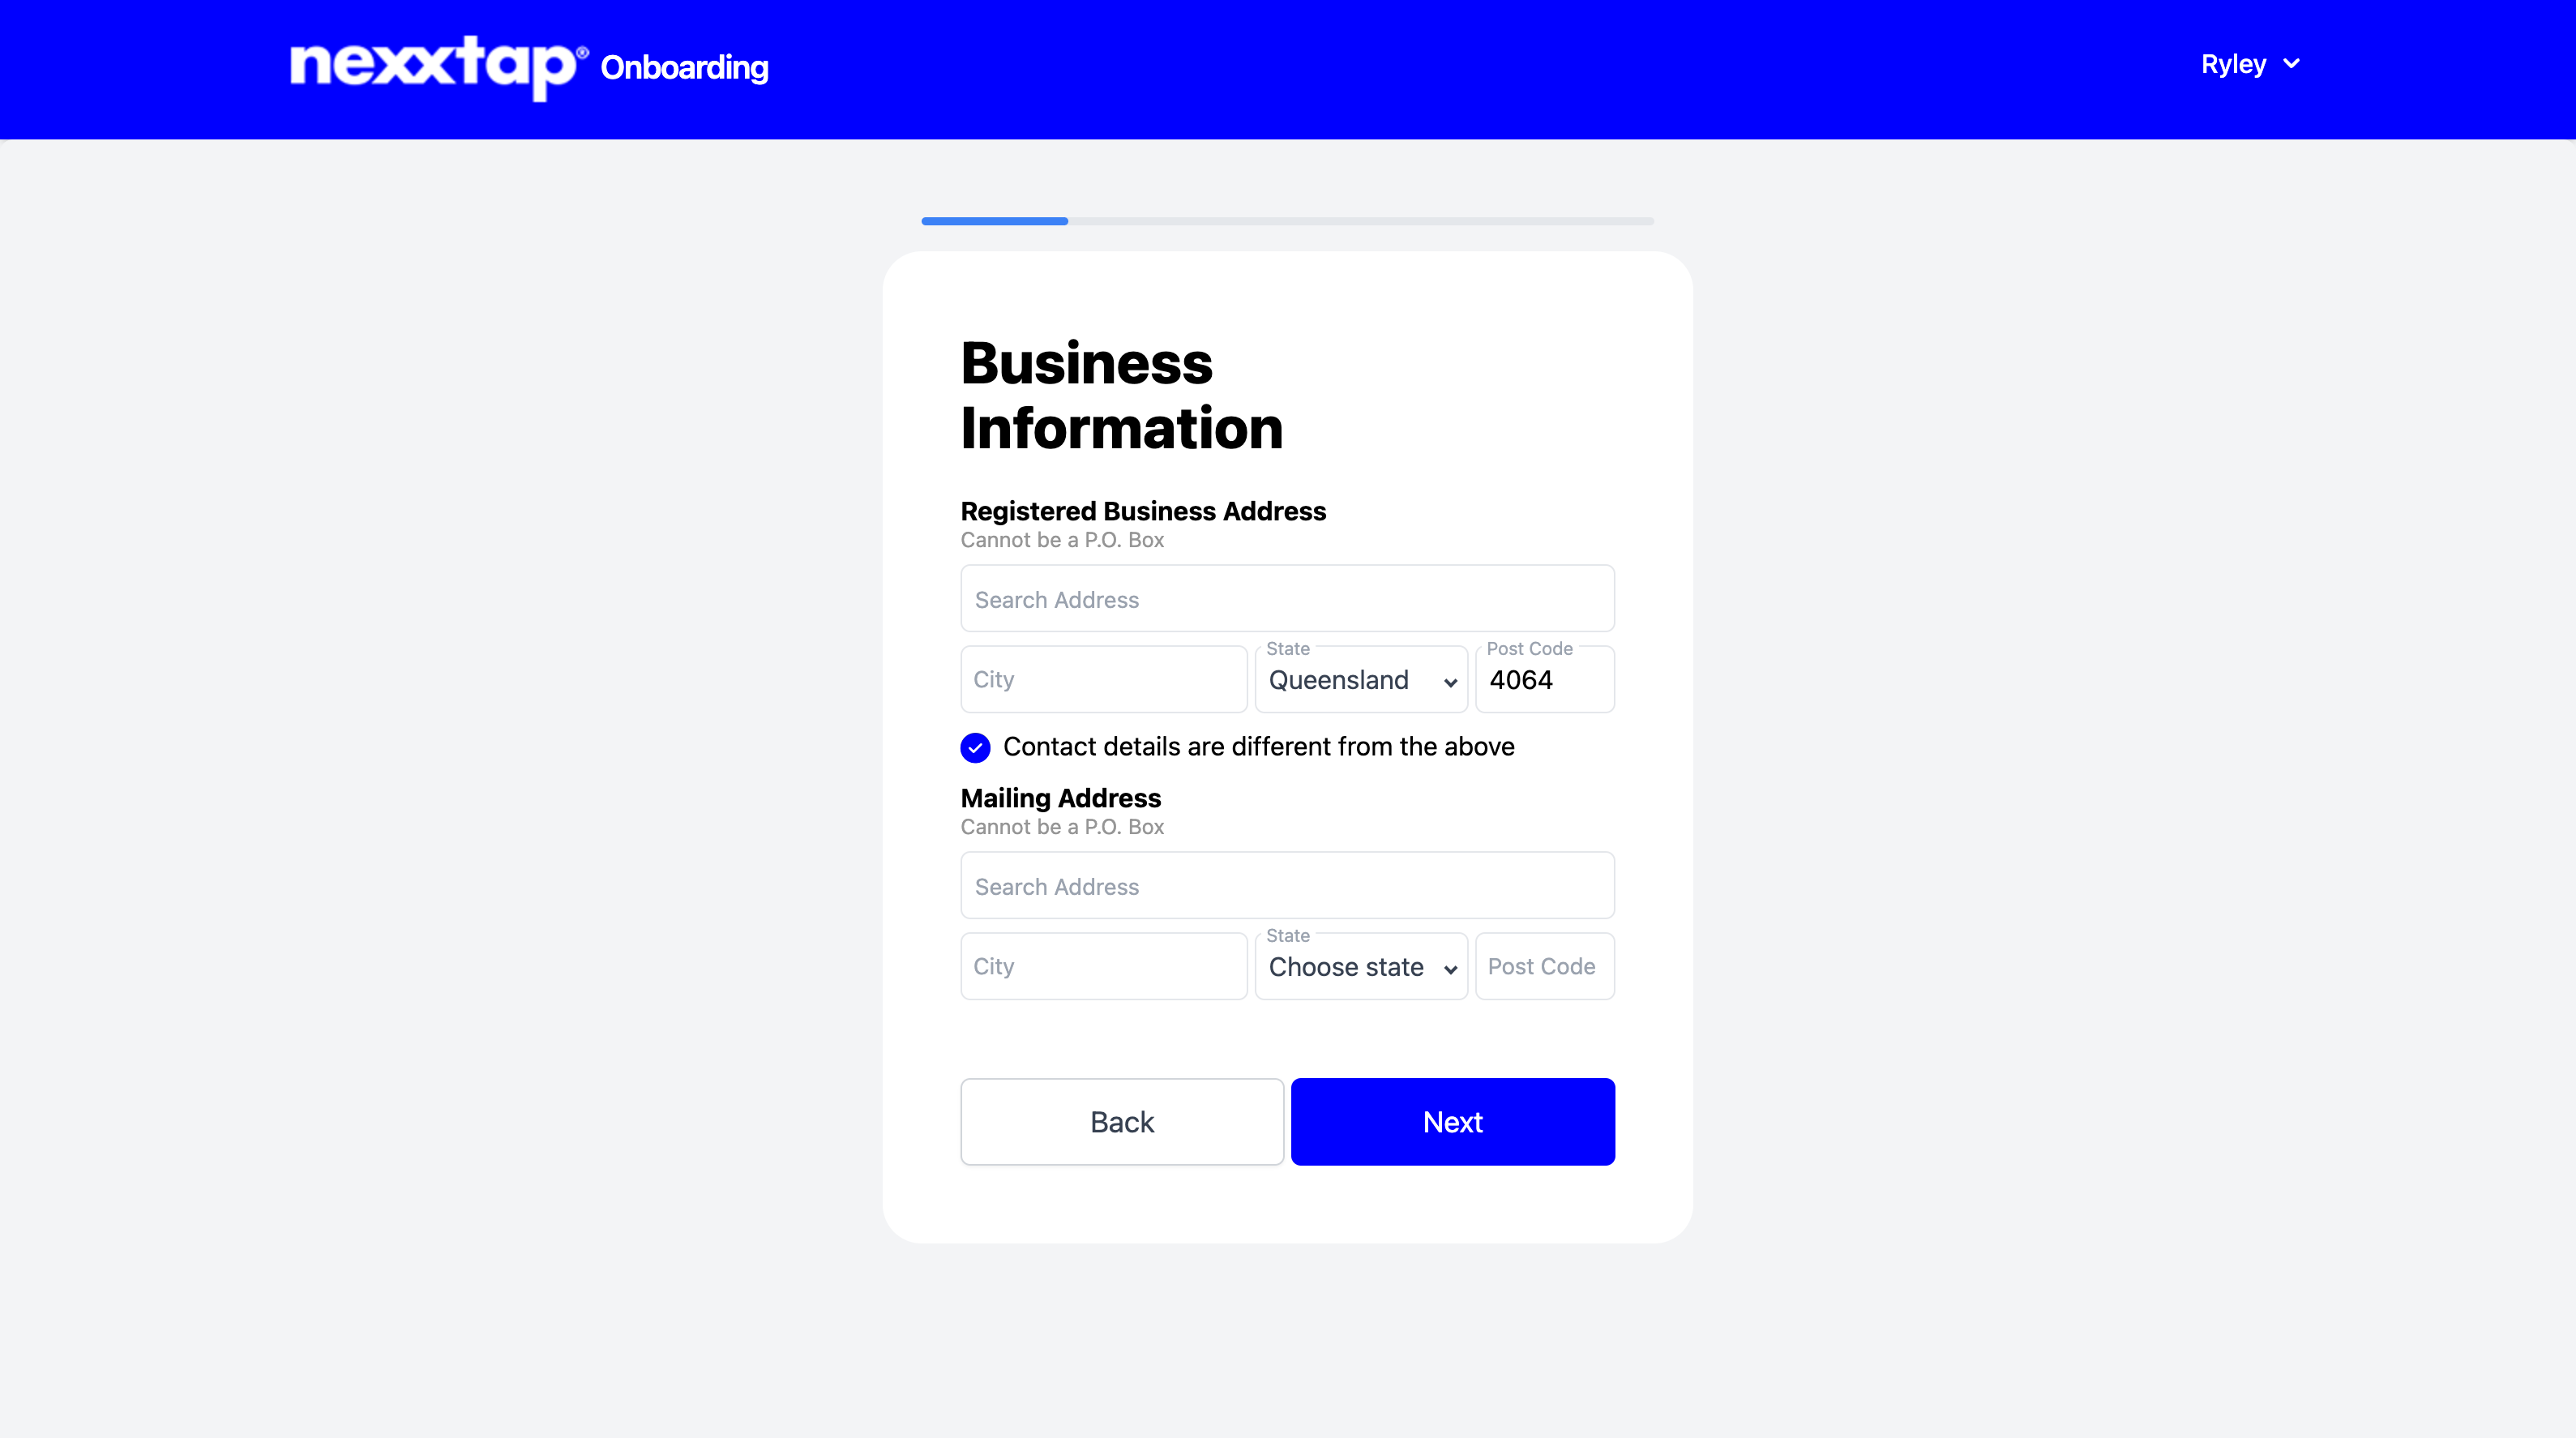
Enter your business details, including your trading name, industry, business address, and website or social media profiles. This ensures your business is properly registered within Nexxtap and helps tailor the platform to your needs.
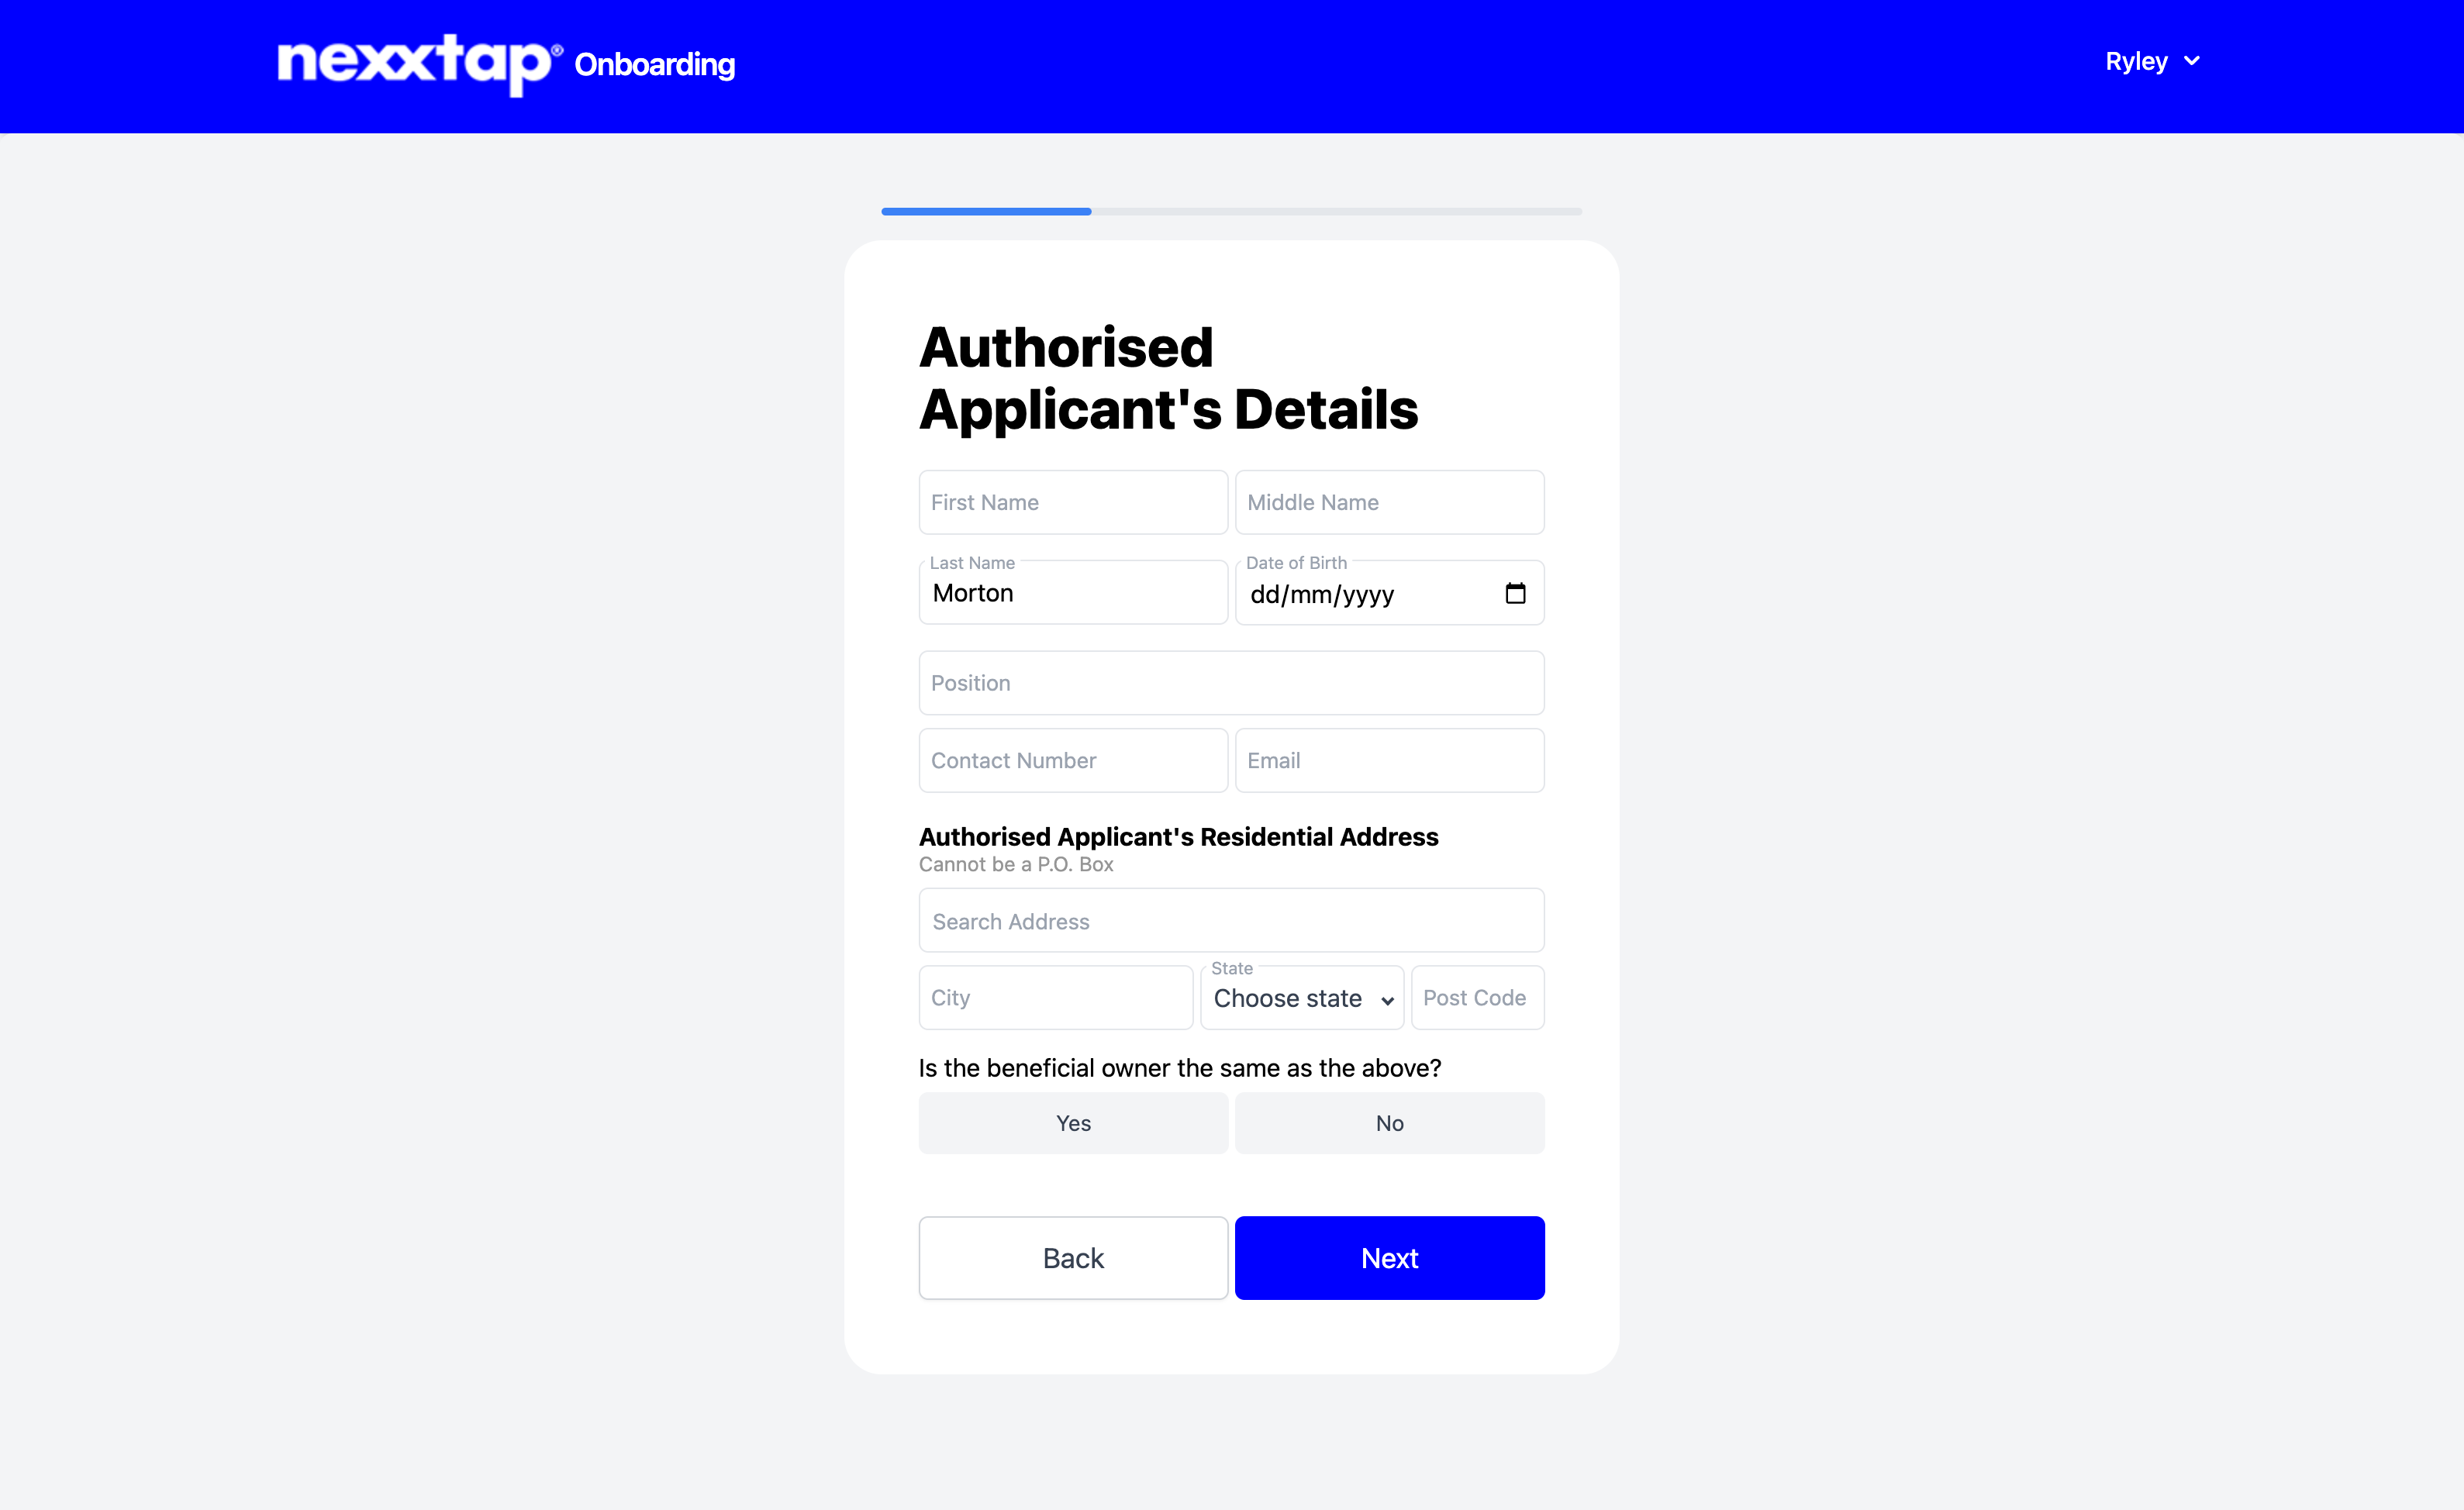
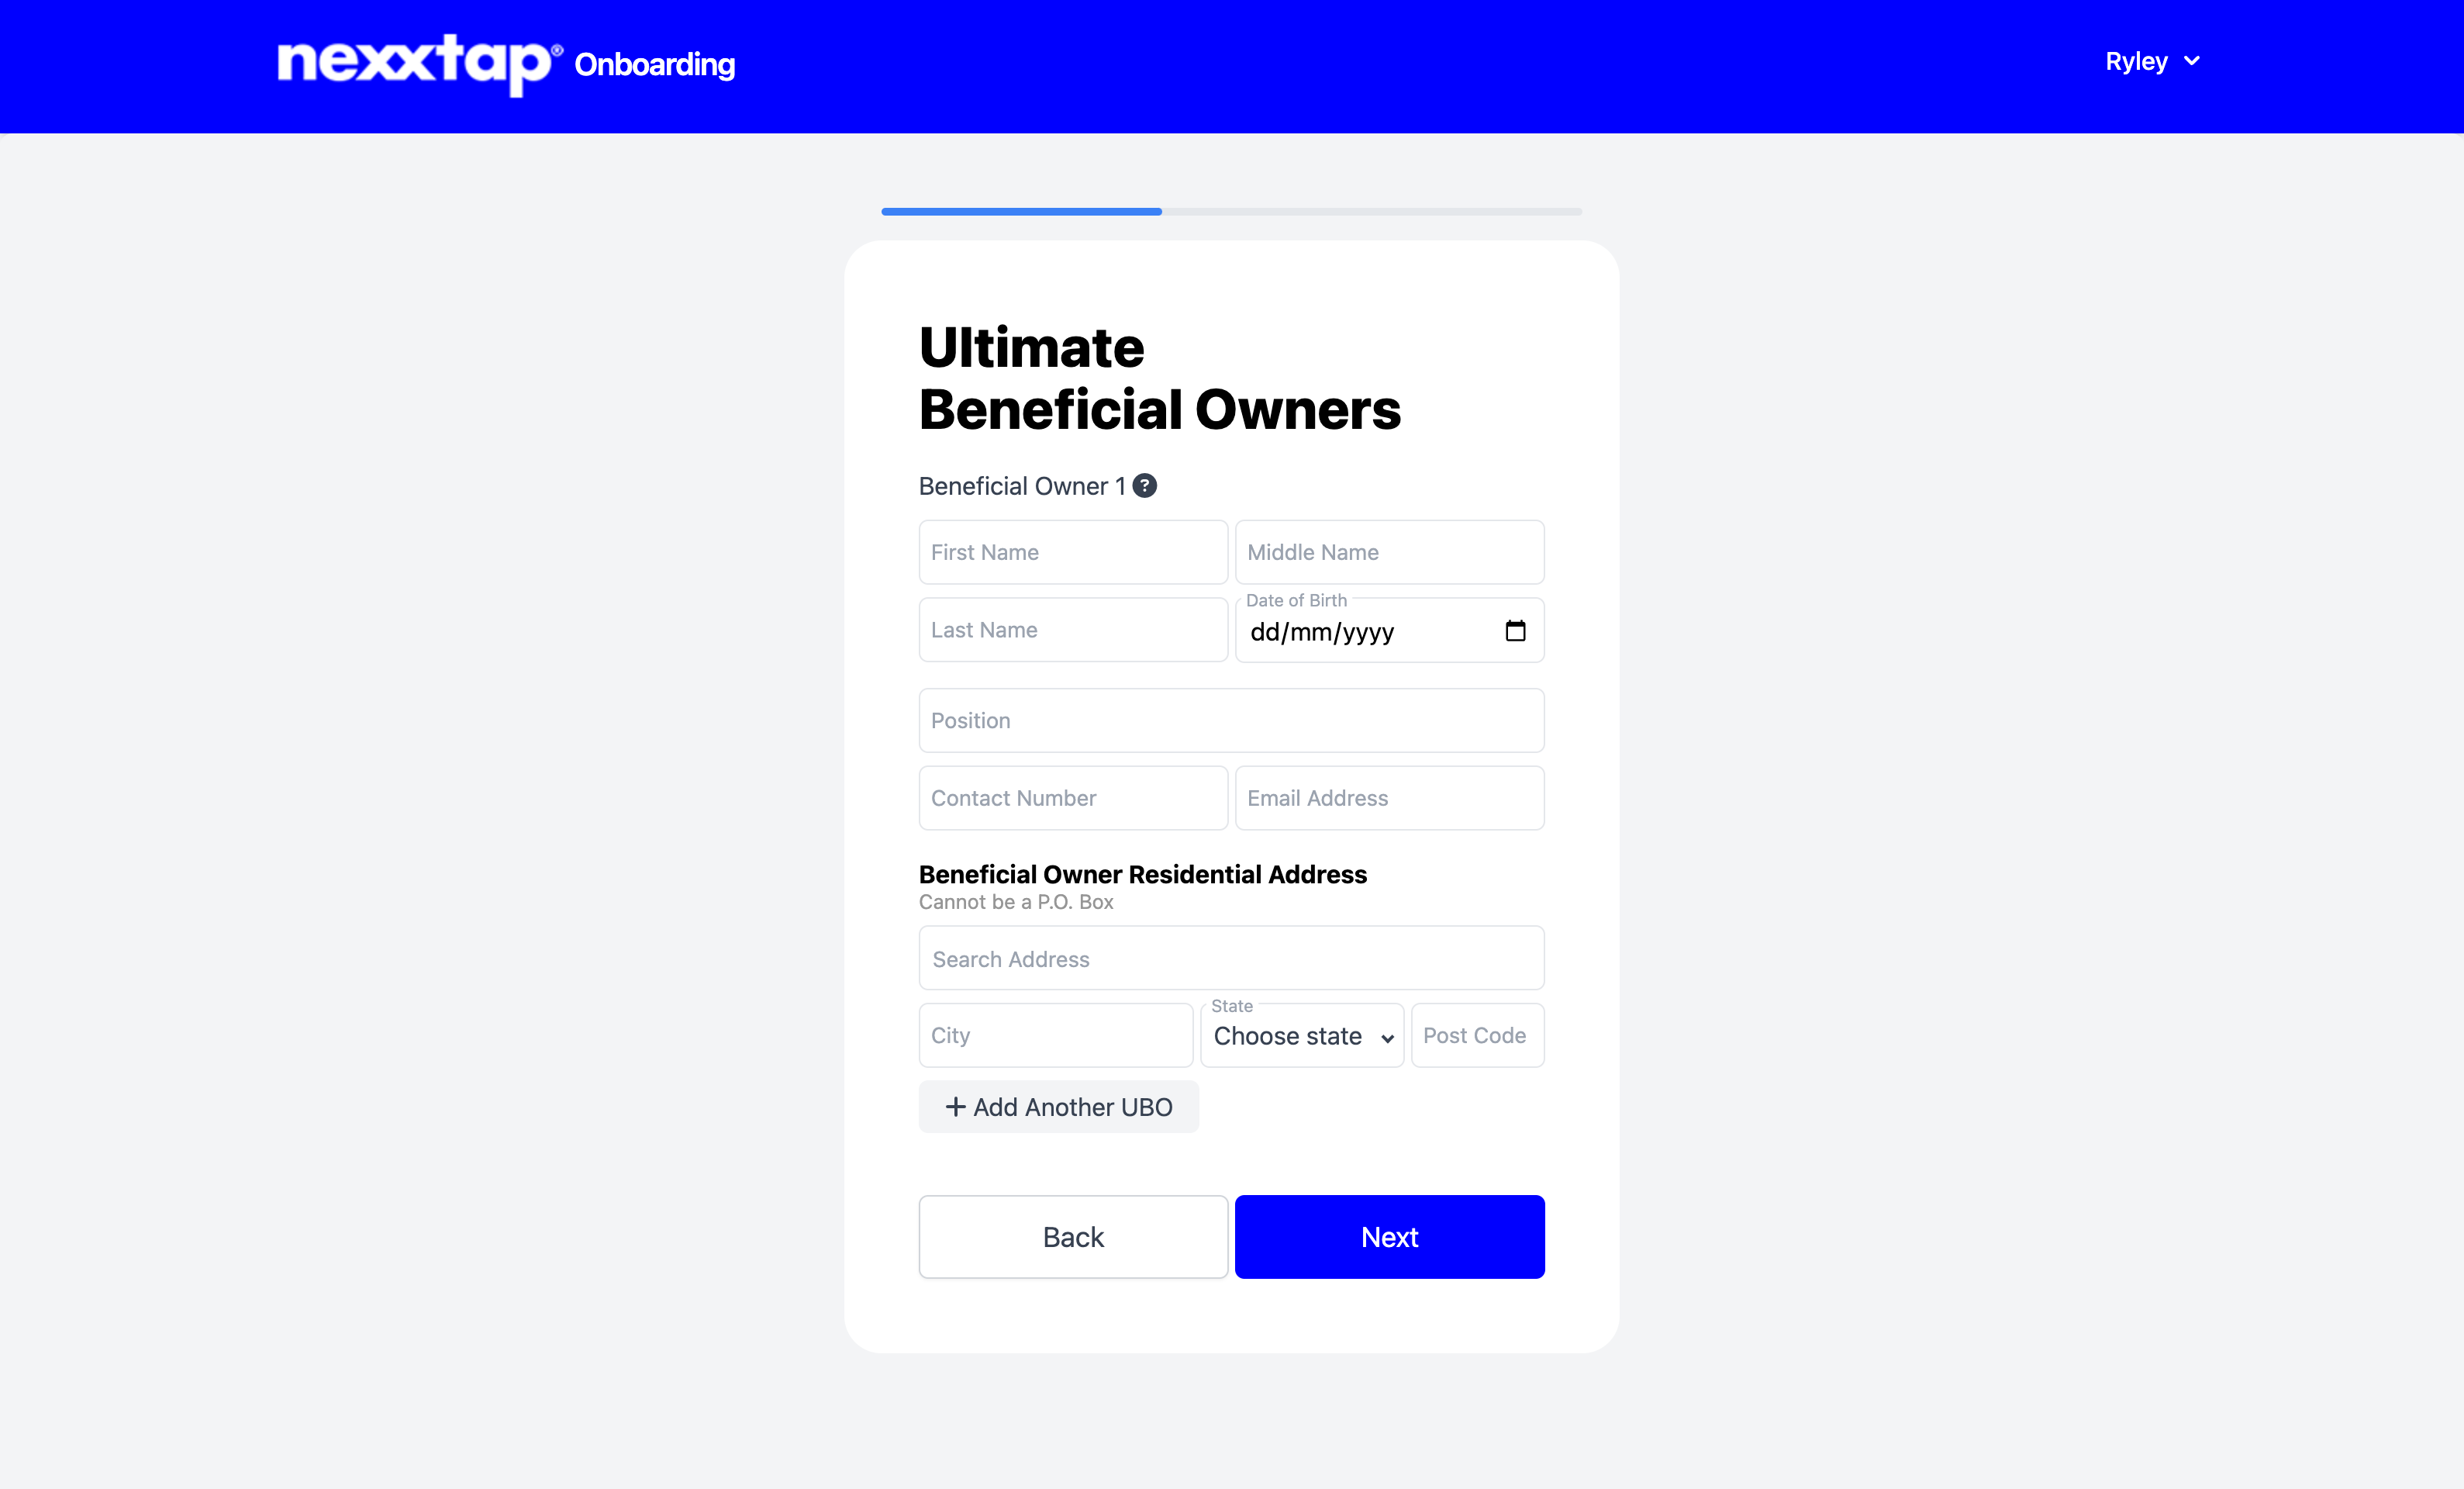
Step 7. Applicant and Owner Details
Provide your personal details, including your identity and role within the business (e.g. owner, manager, or CEO). This step is essential for verifying key business representatives and ensuring accurate contact information for compliance purposes.
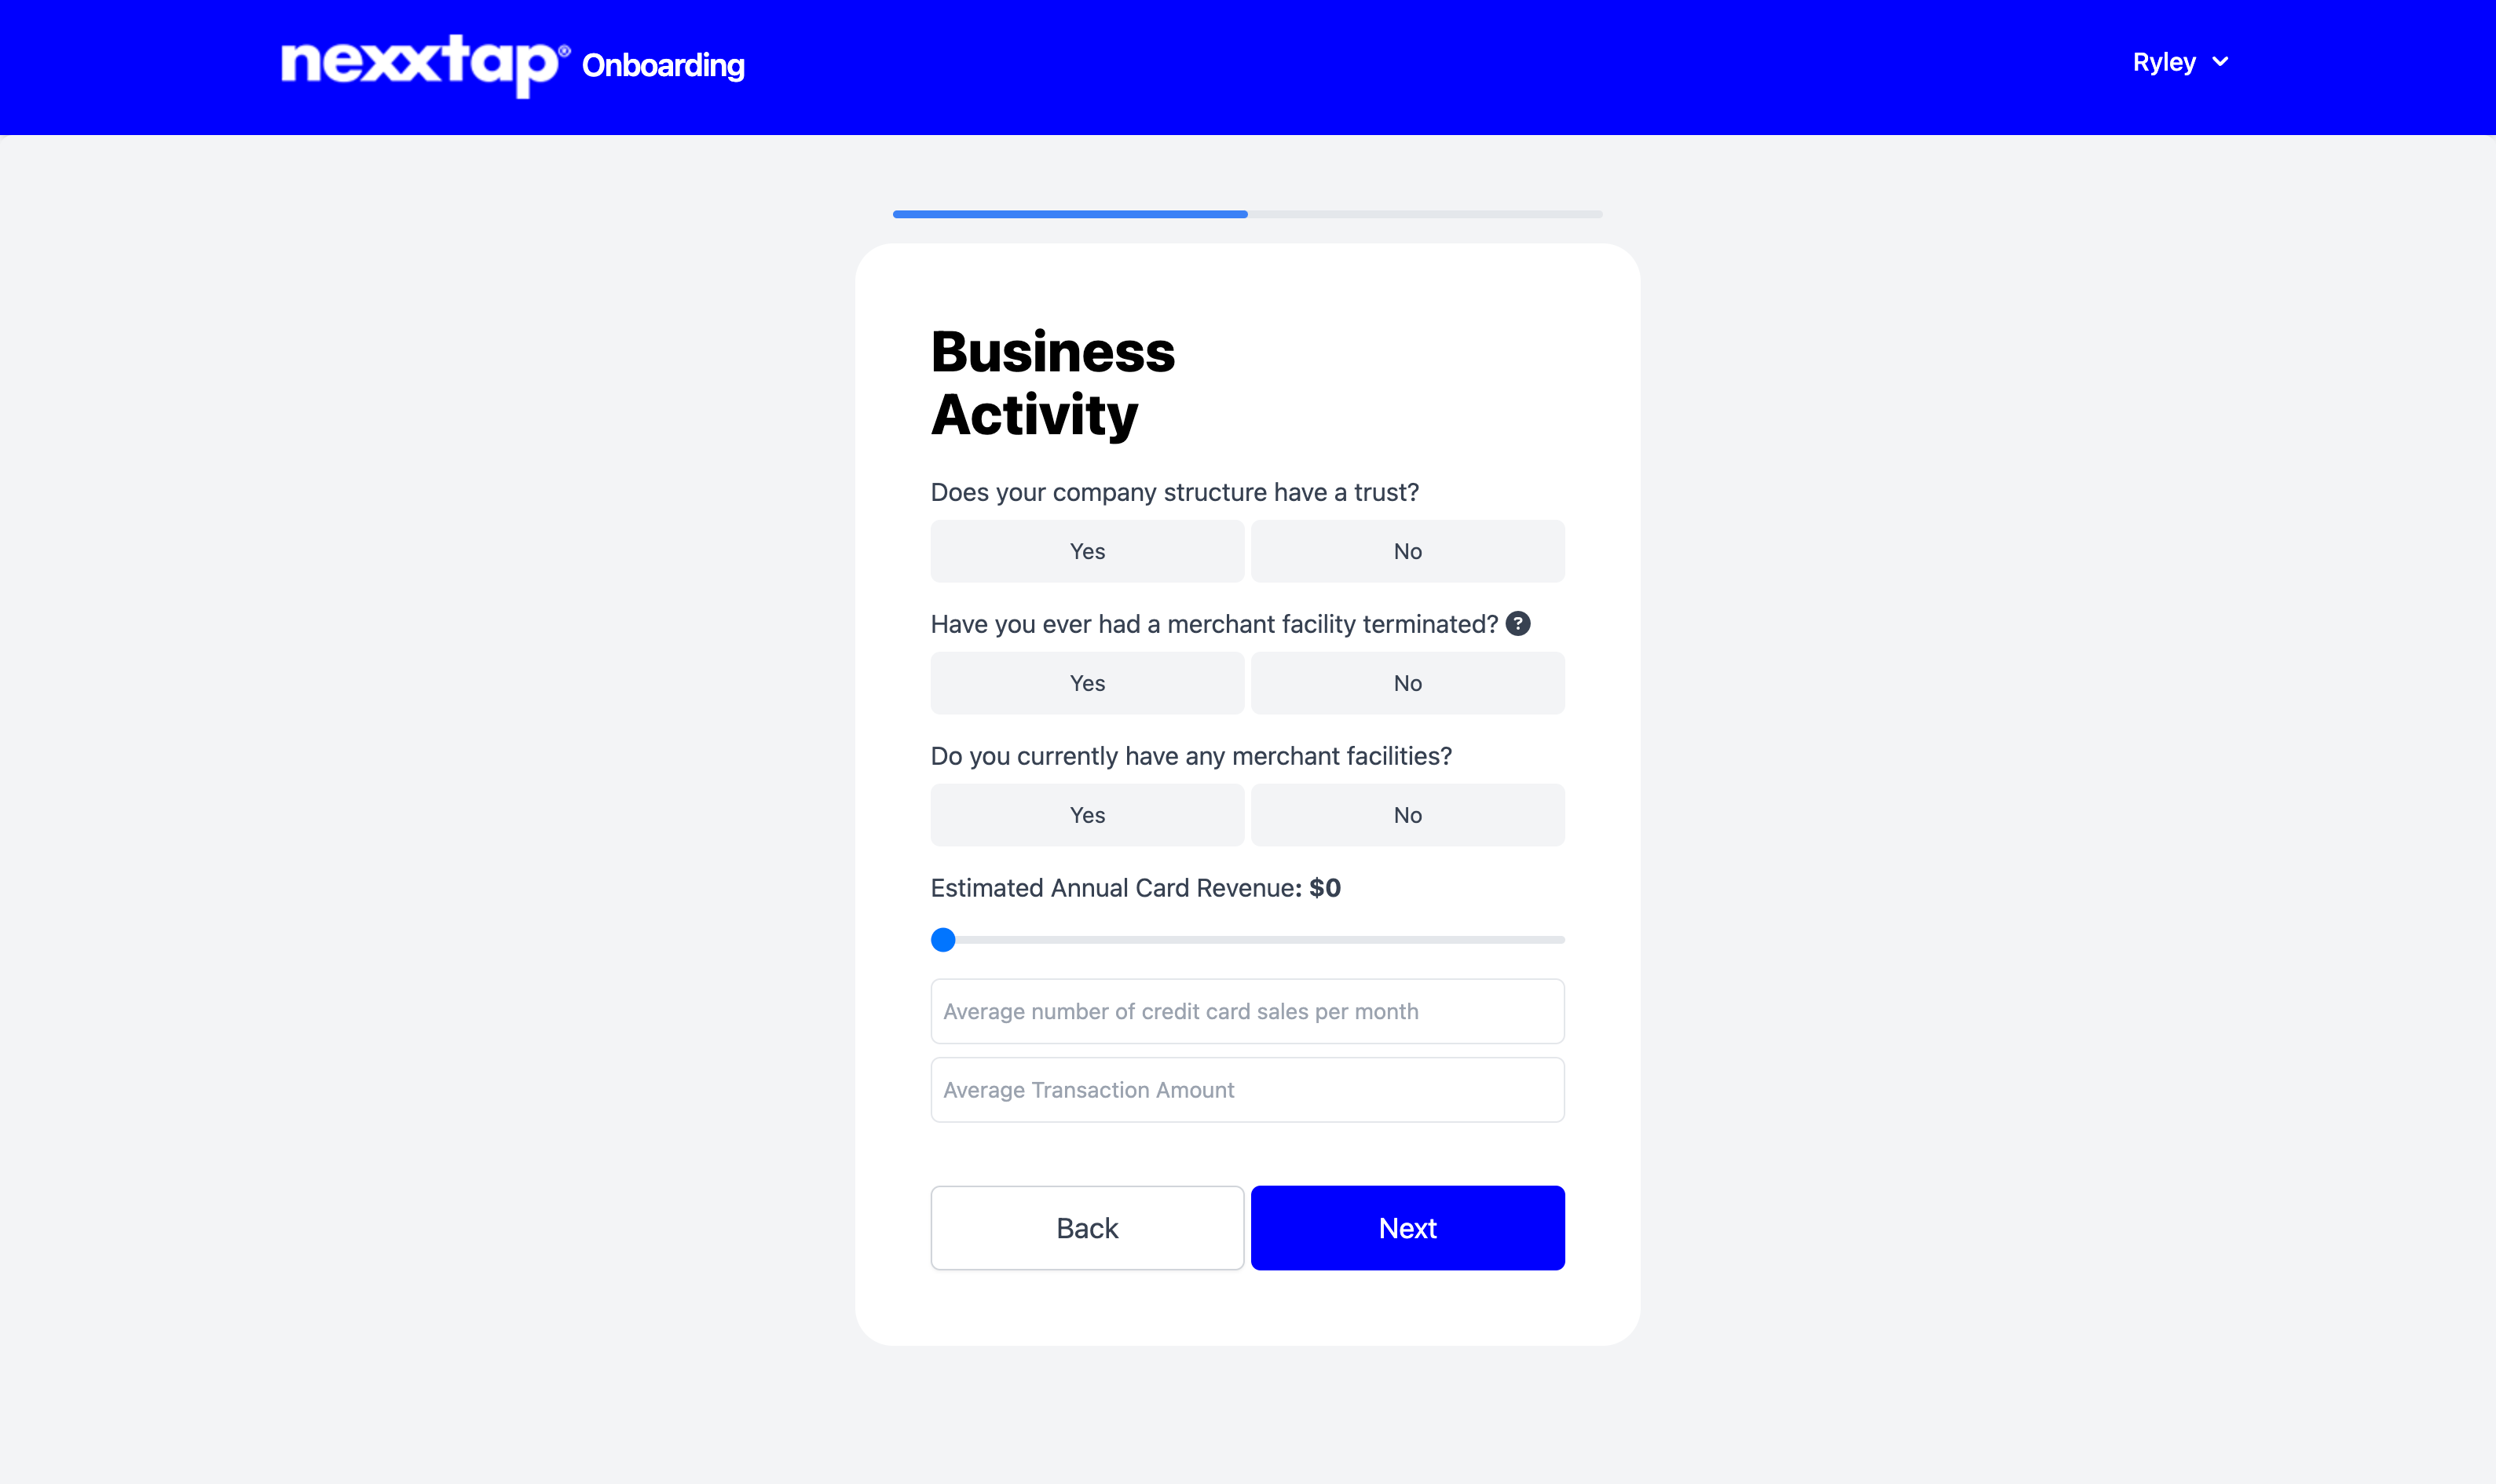
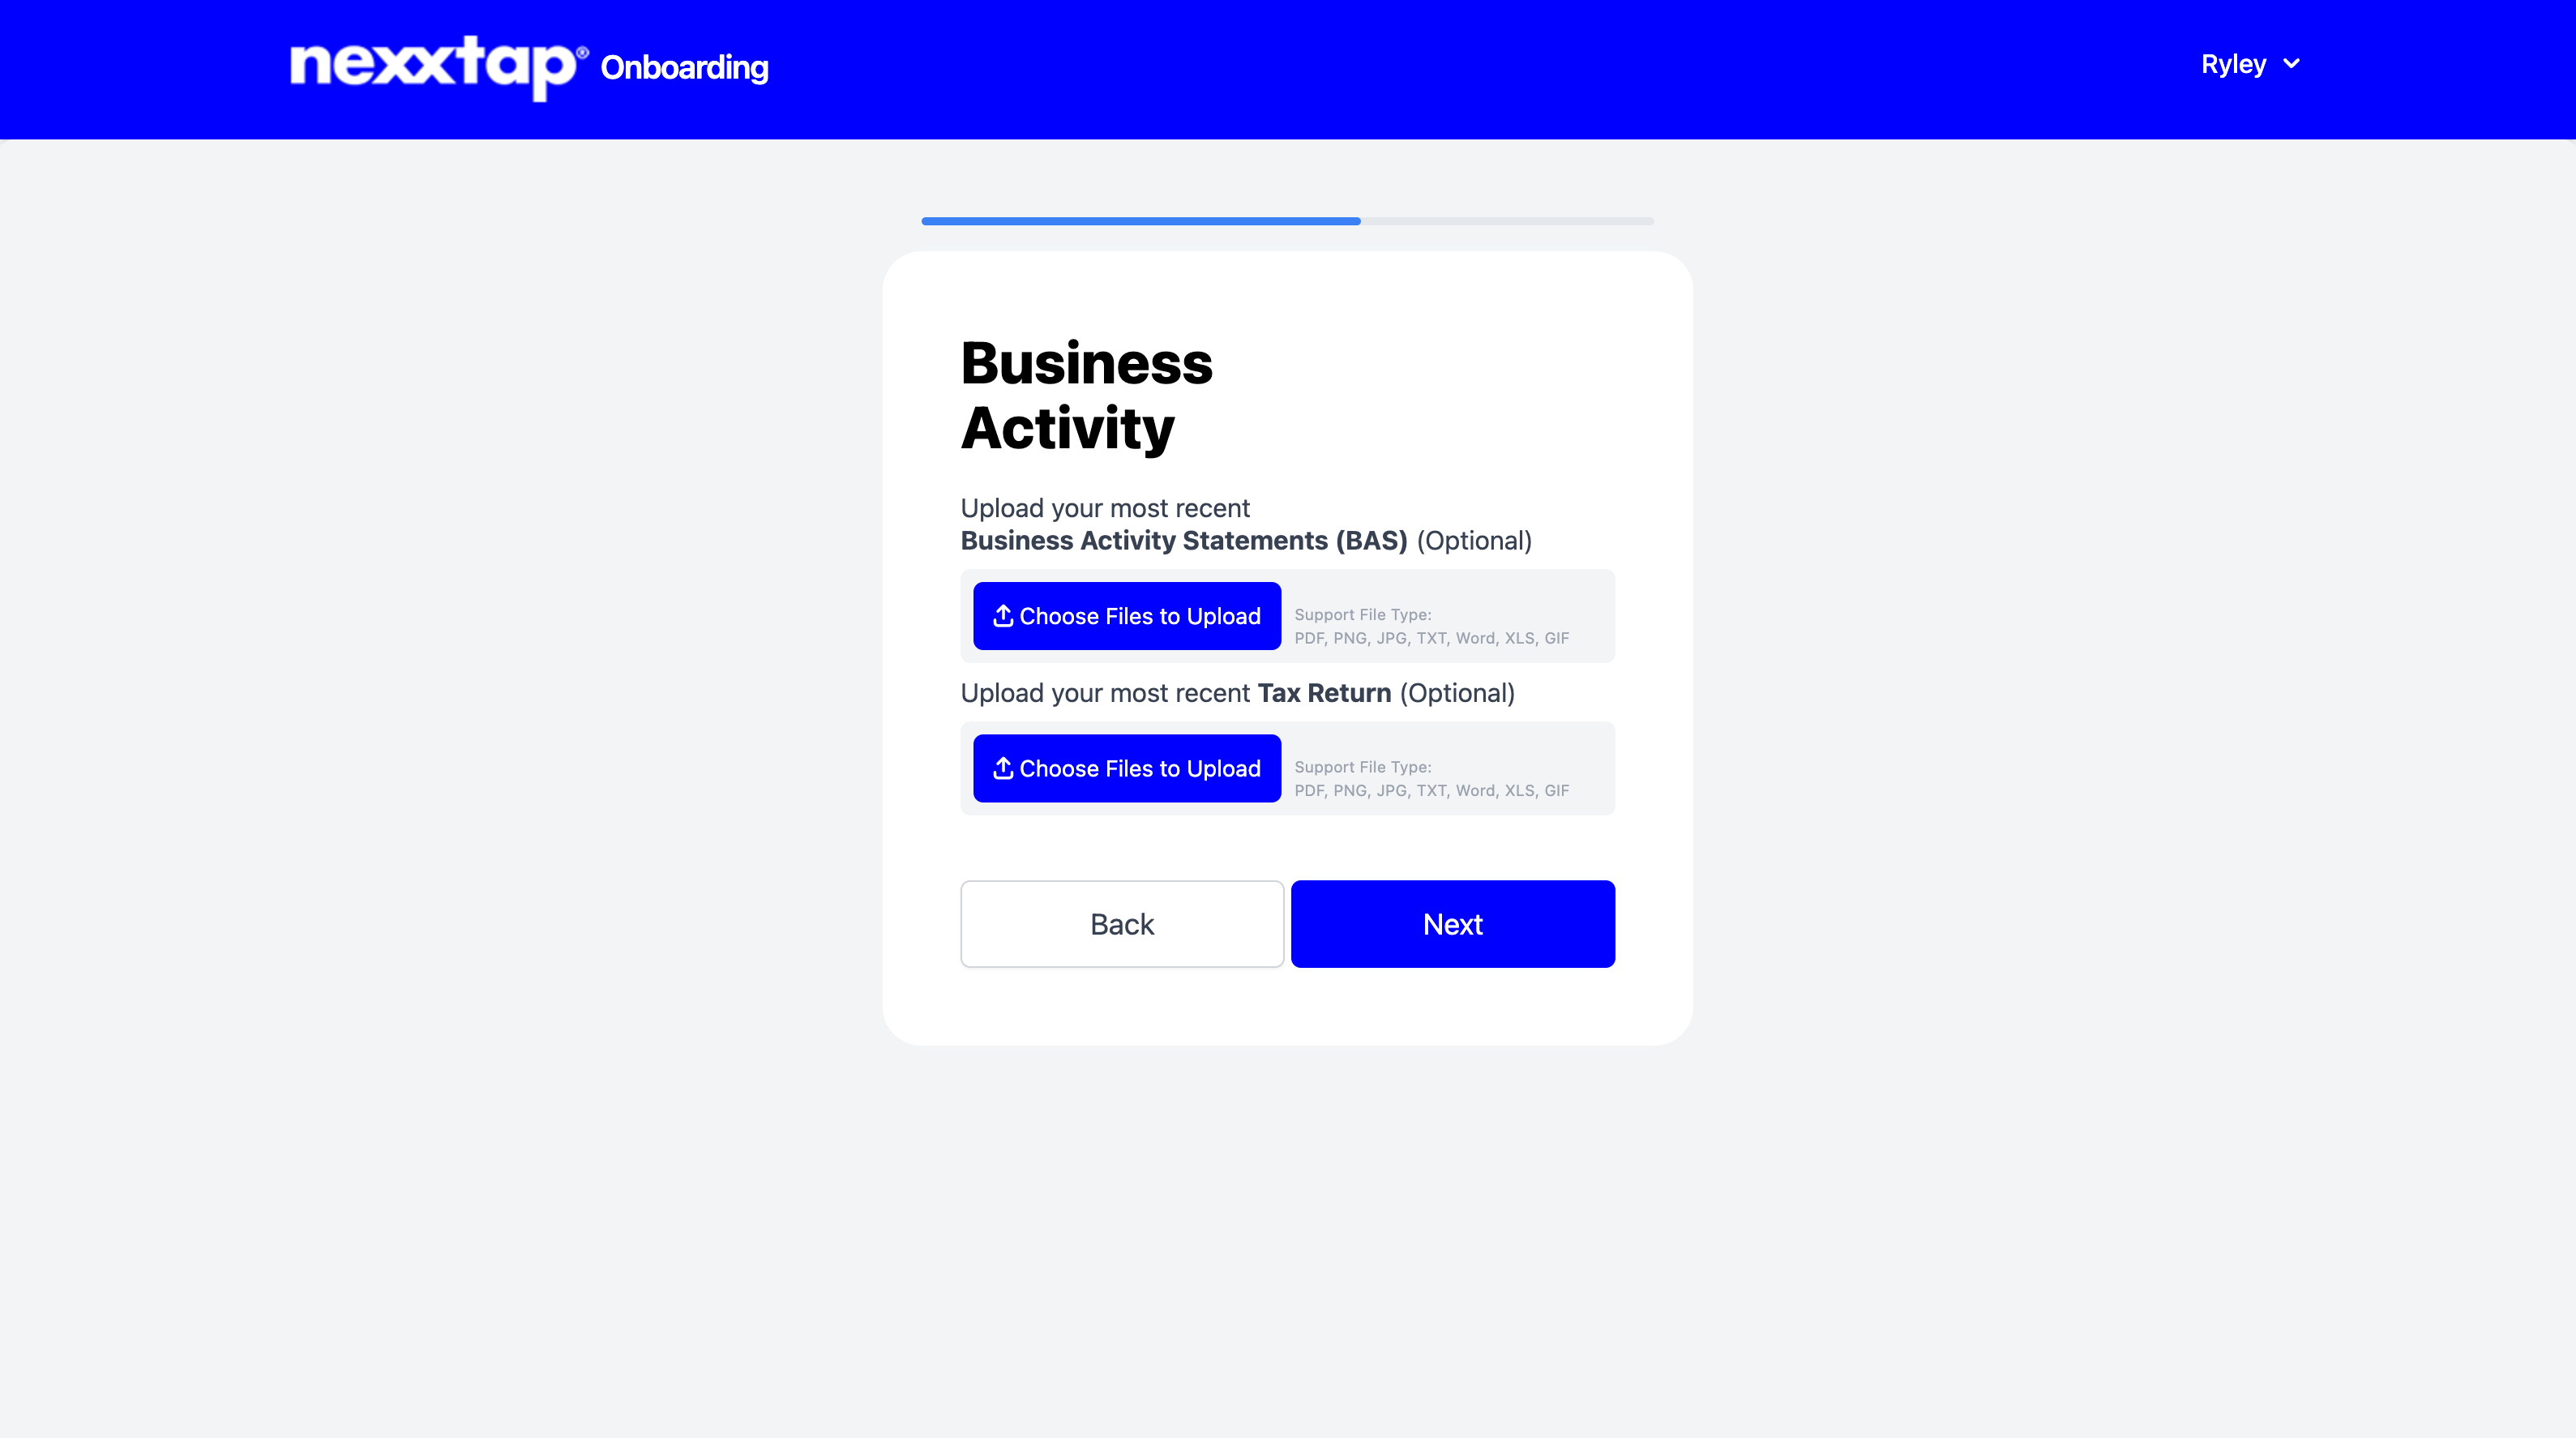
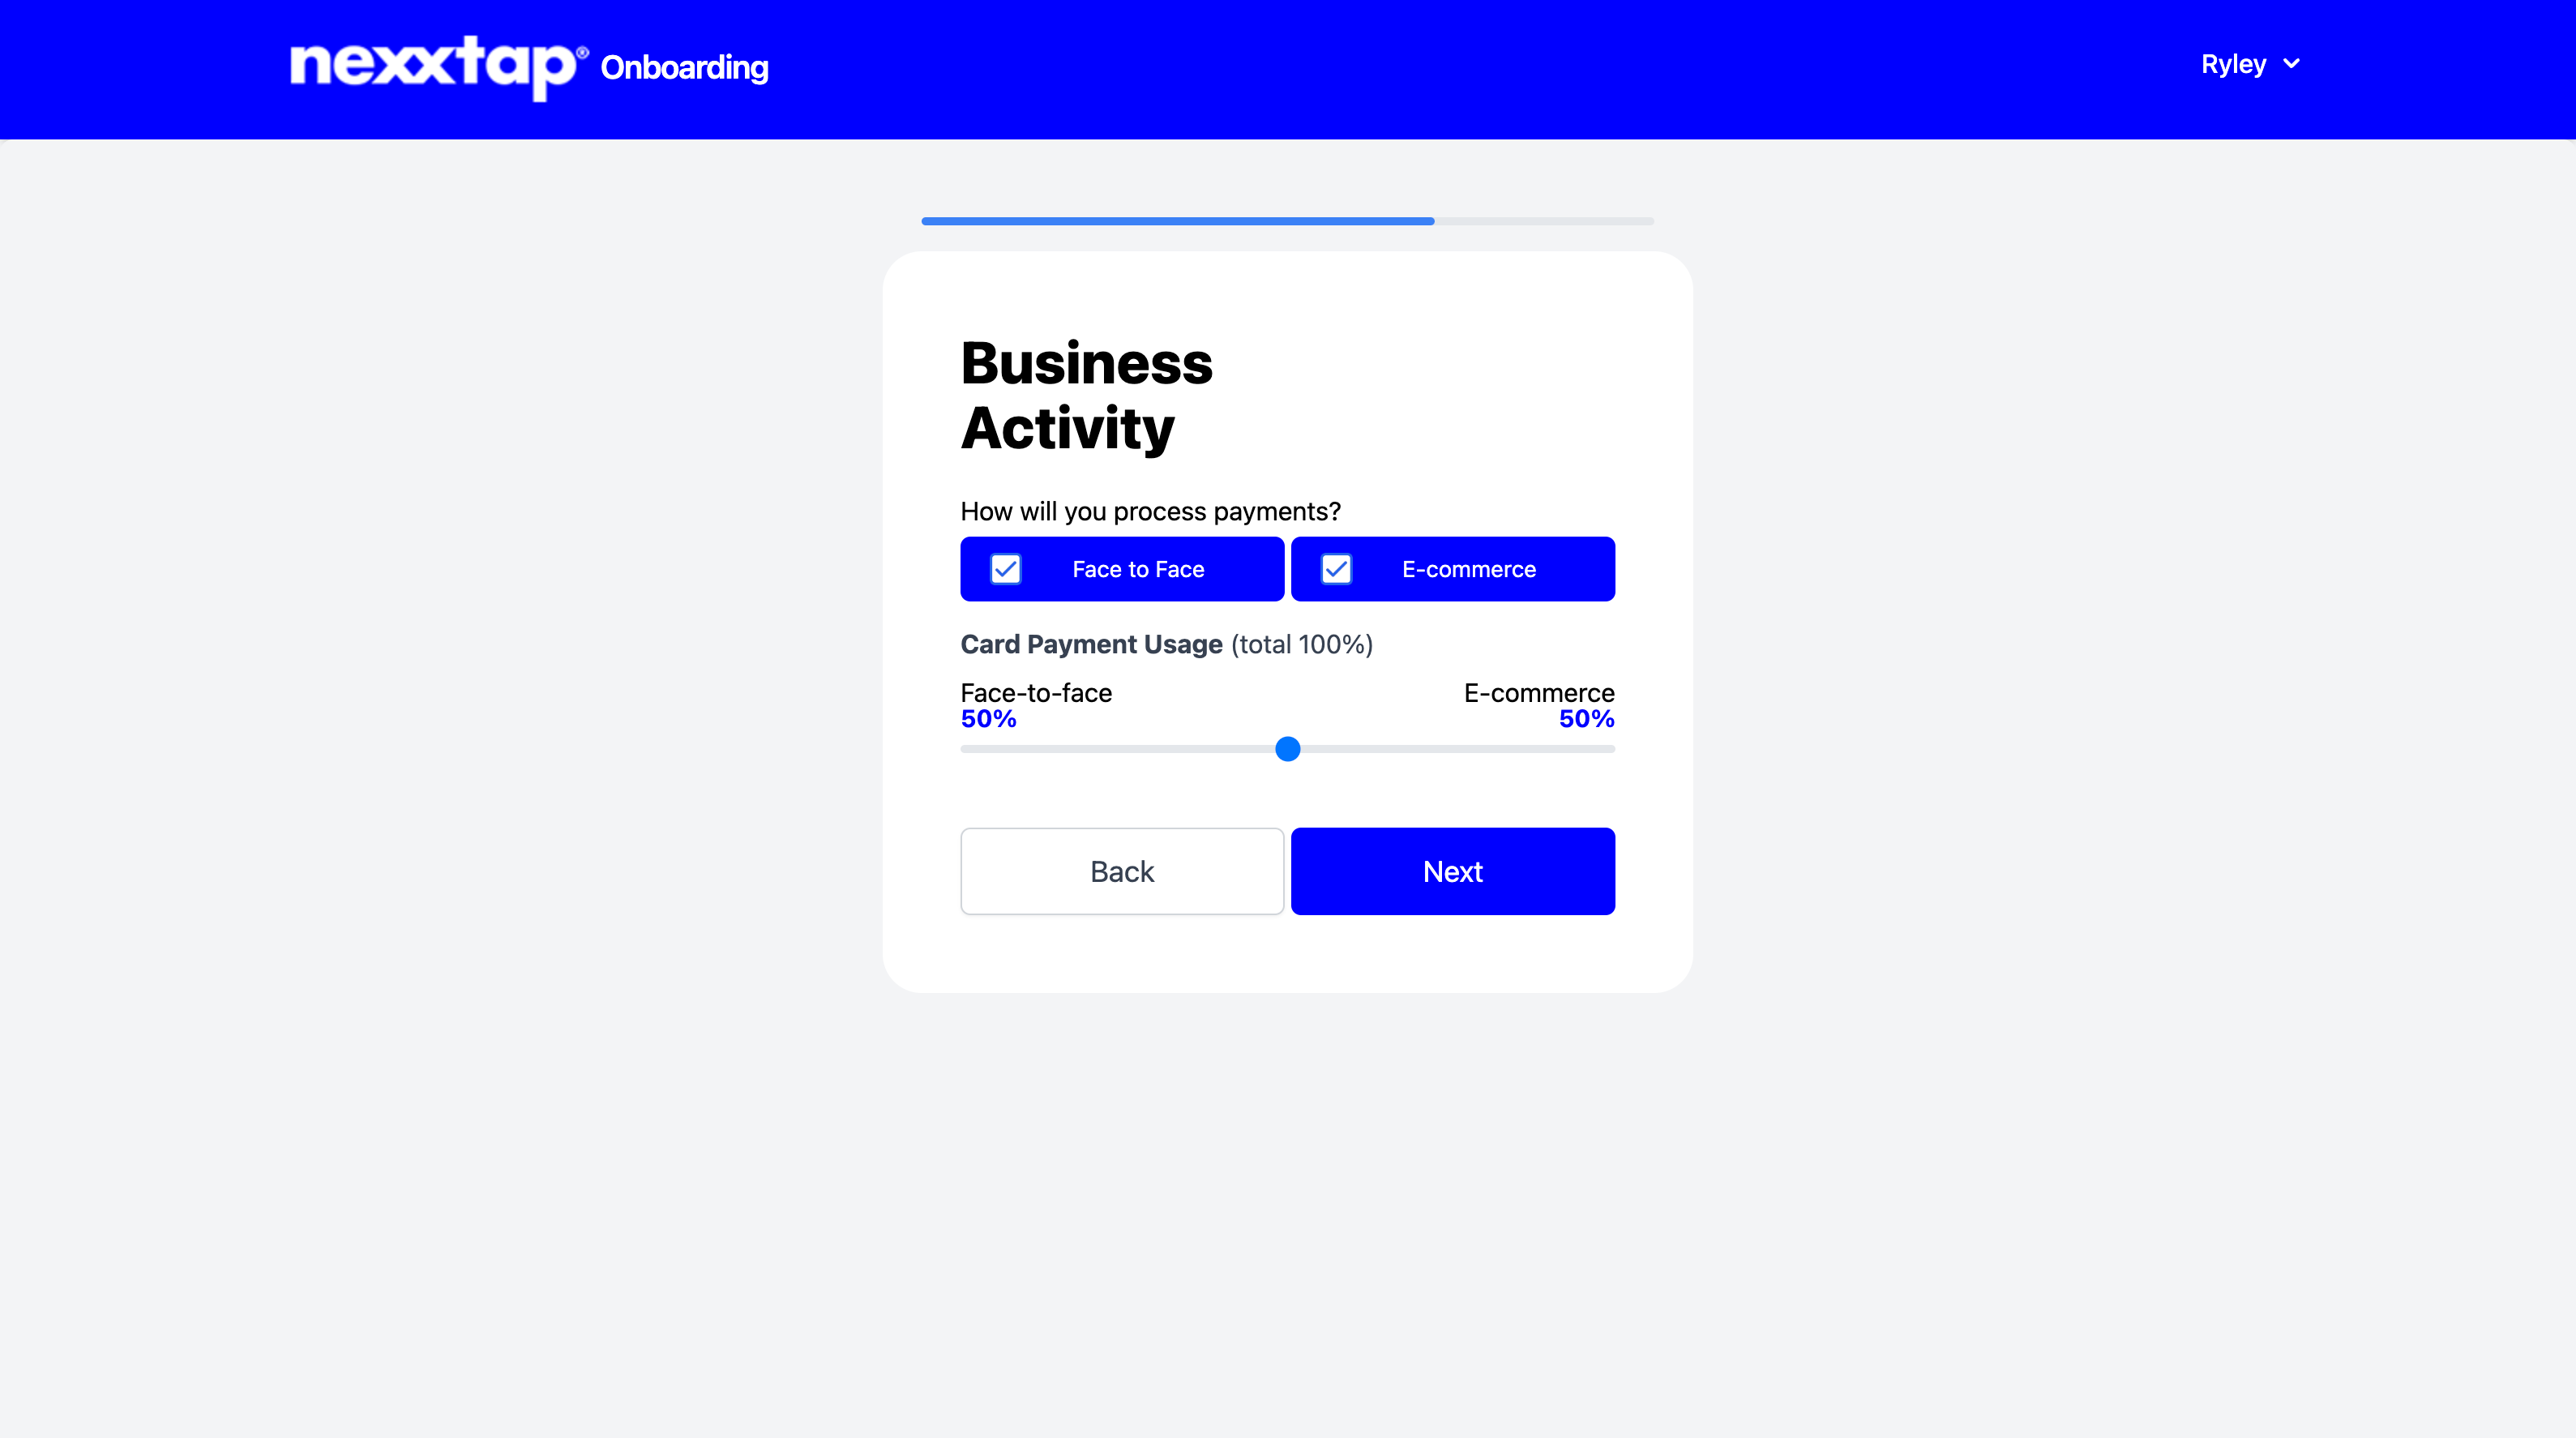
8. Business Activity
Provide details about your business operations, including financial information such as BAS or tax returns. This helps confirm your business’s solvency and ensures a smooth payment setup based on how your customers prefer to pay. Rest assured, all information is securely held for vetting purposes only. Completing this step also helps ensure that funds from transactions are deposited into your account by the next business day, significantly reducing the risk of withheld payments.
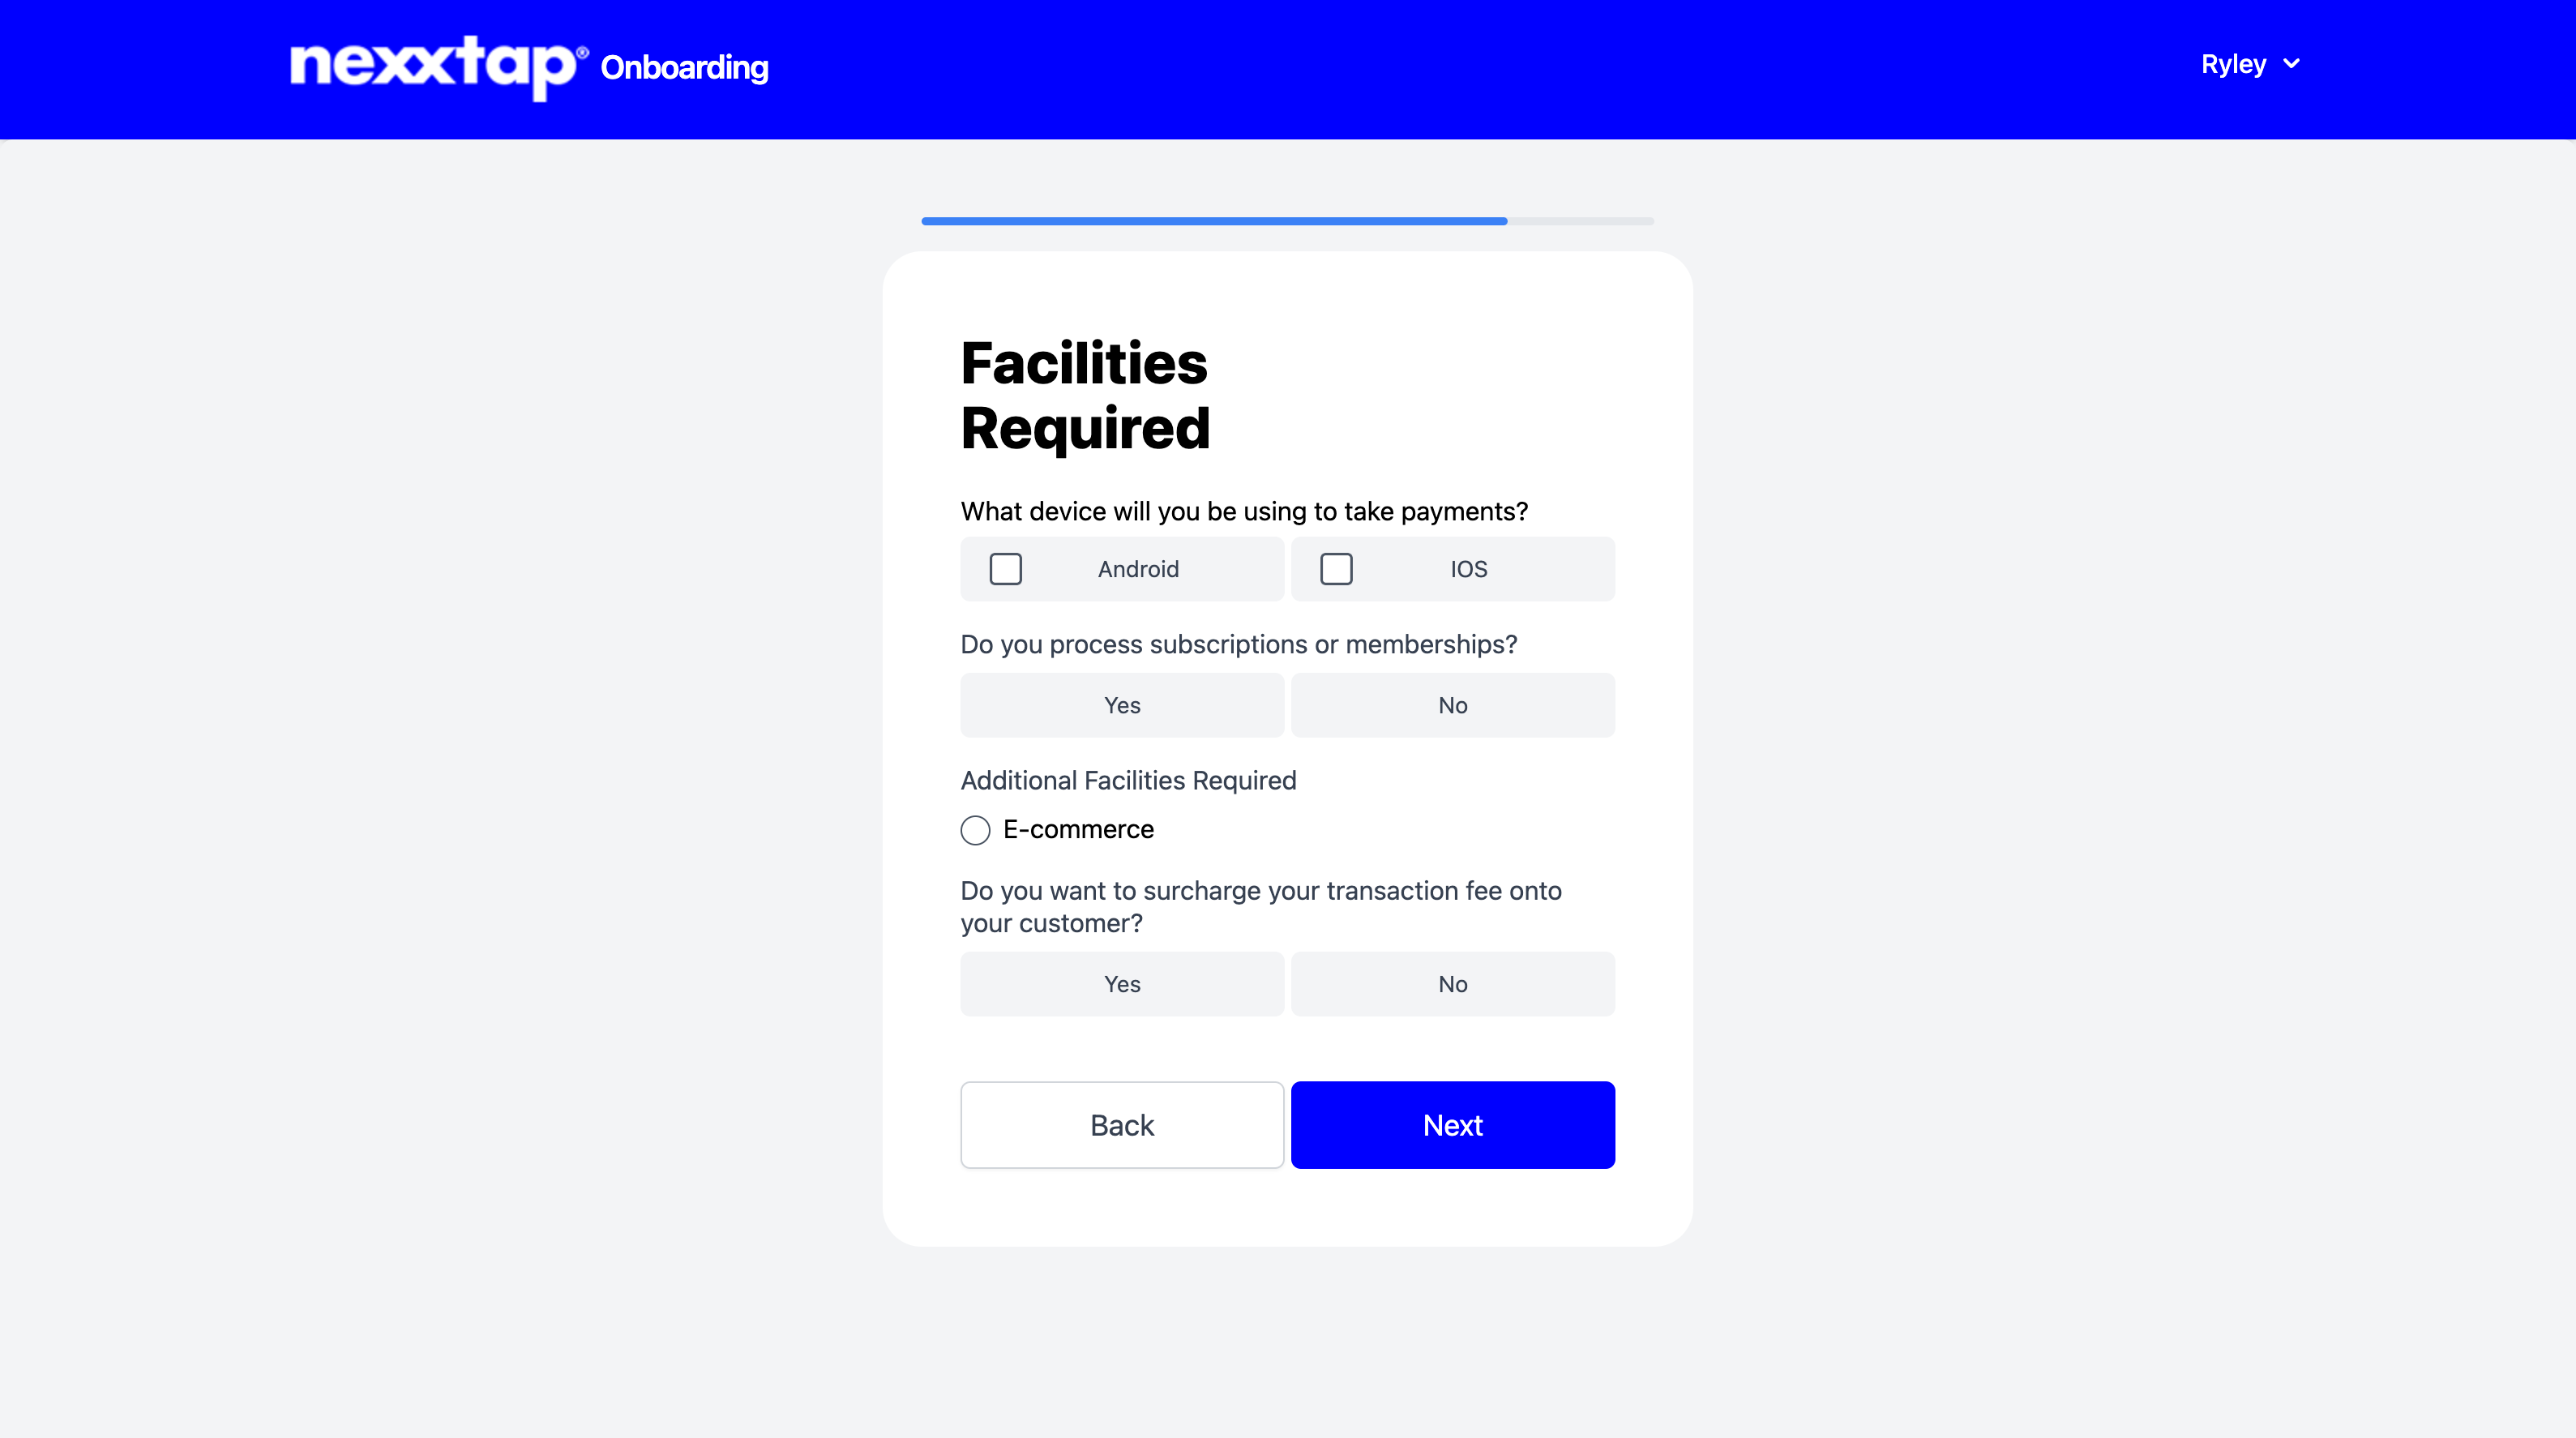
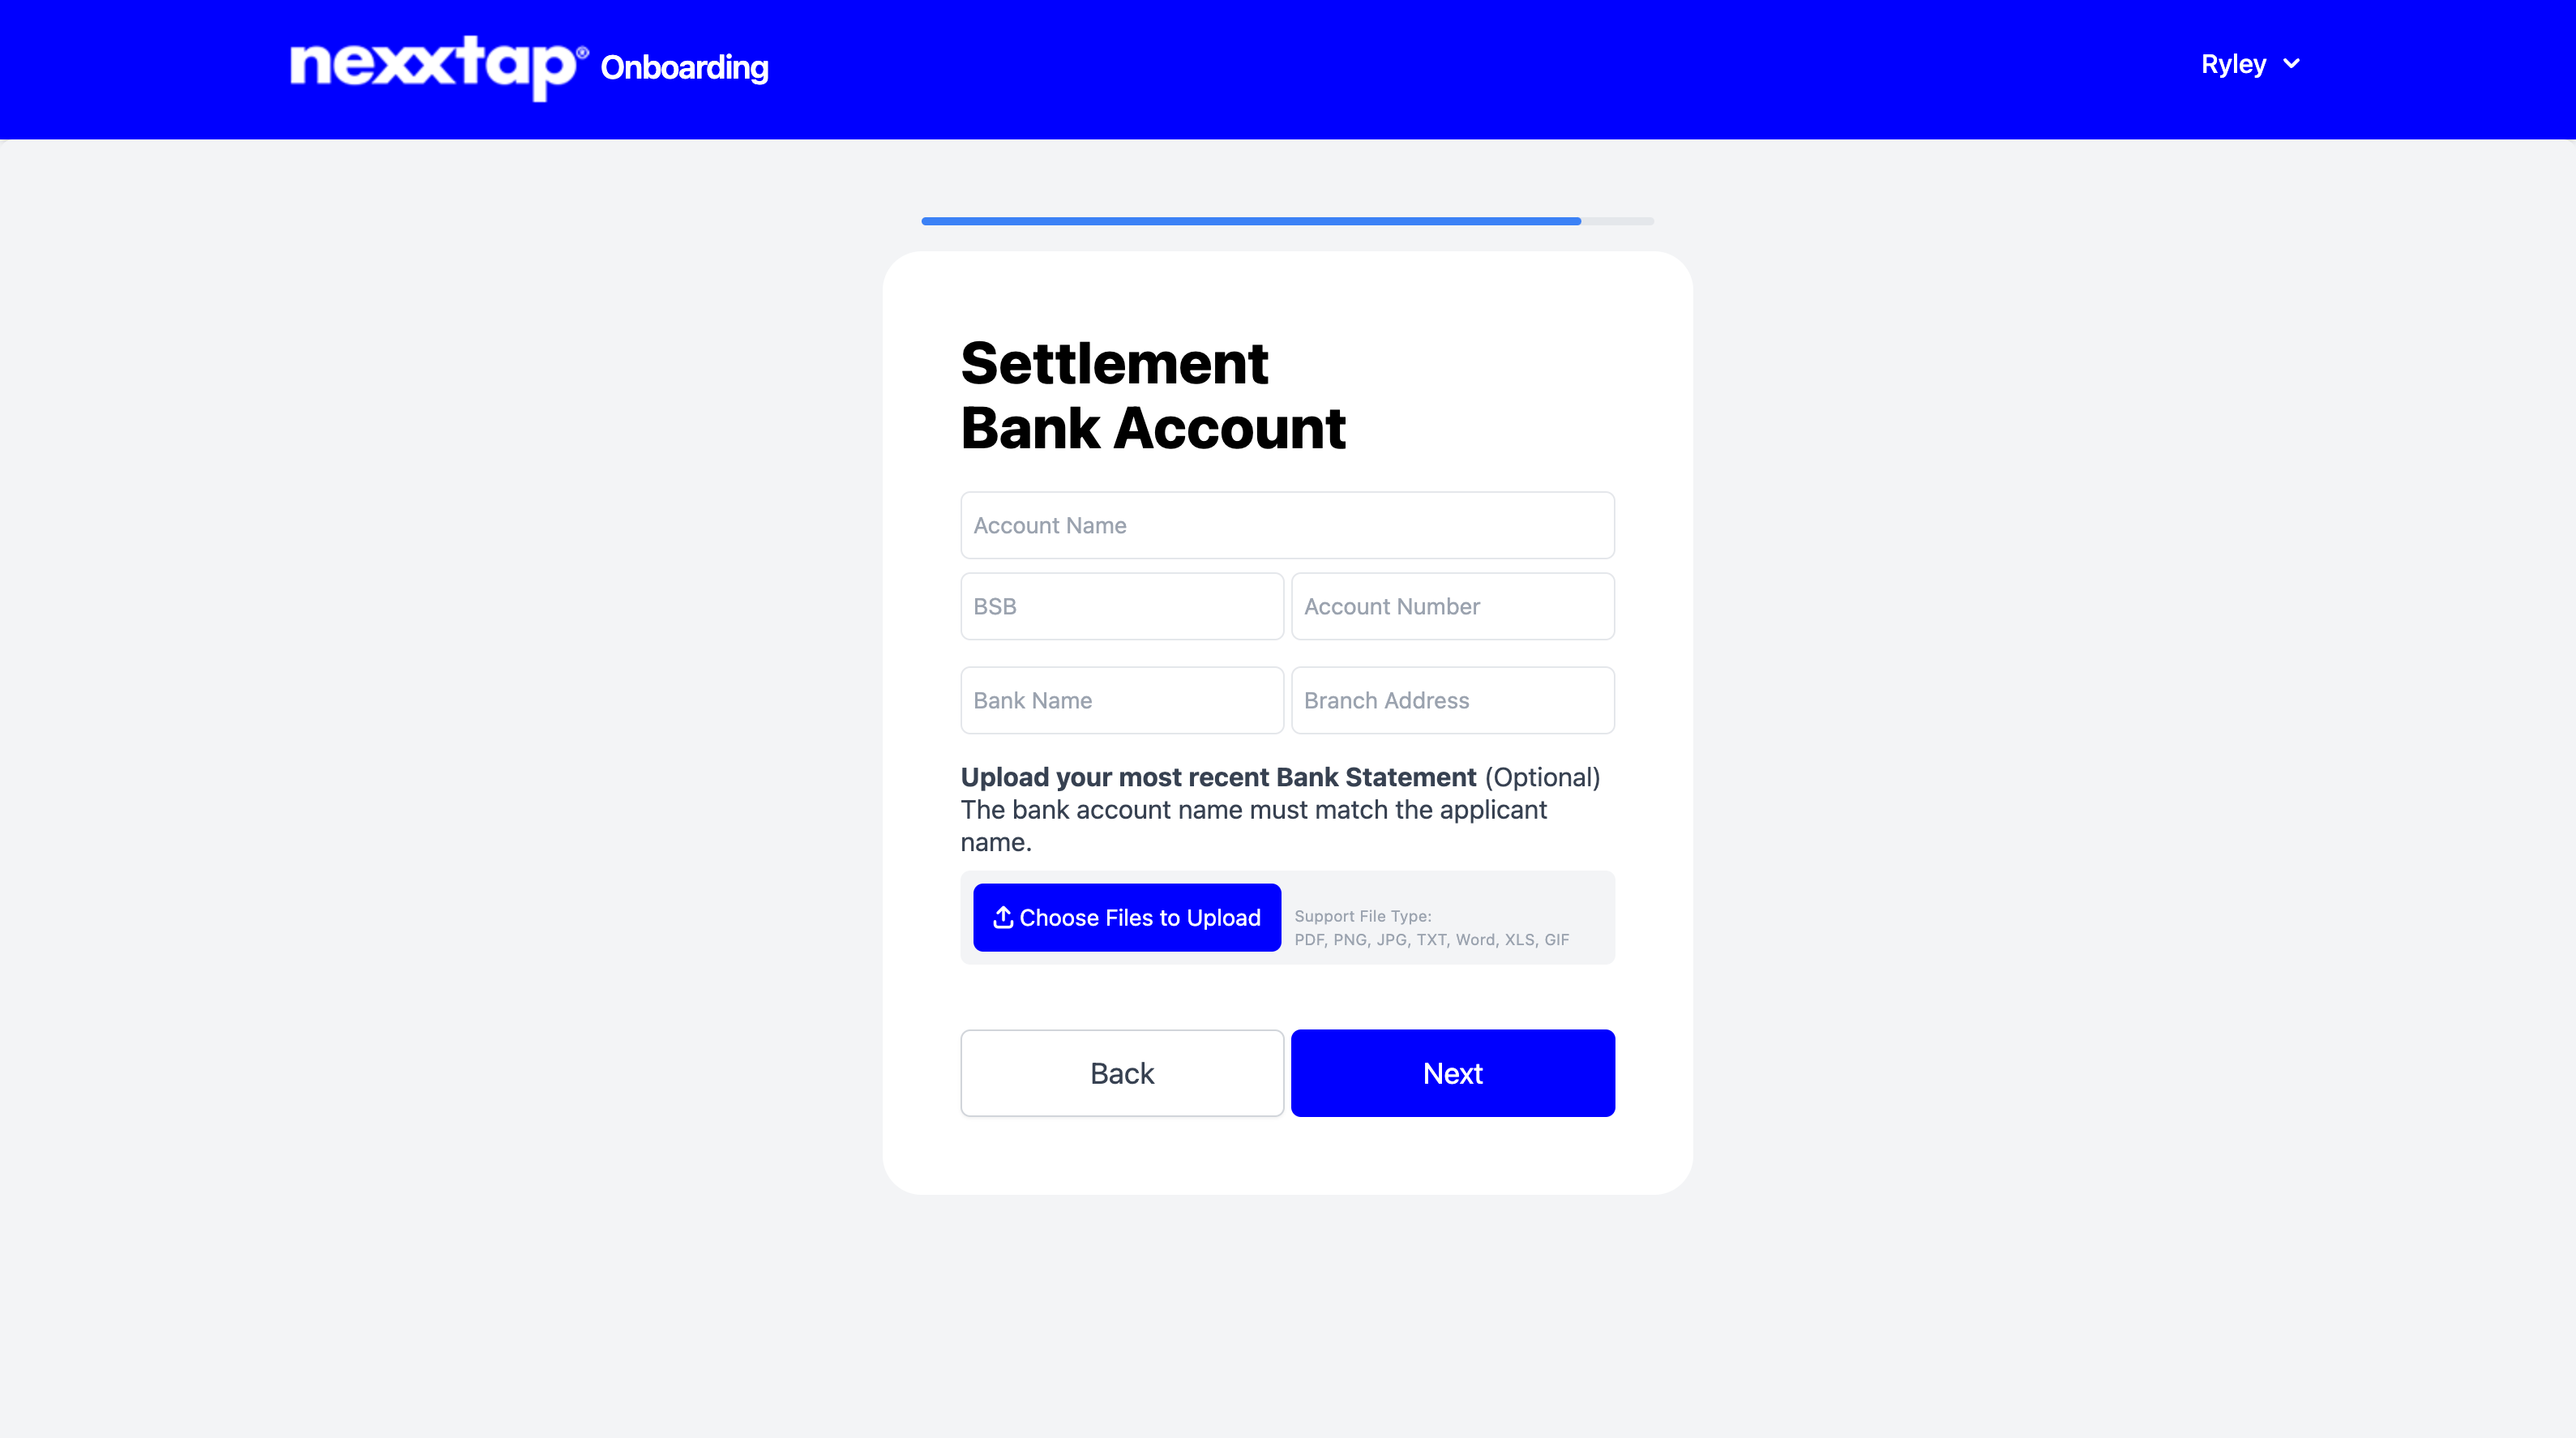
Step 9. Facilities Required
Provide details about your facility requirements to help us tailor Nexxtap to your business needs. Ensure your nominated account details are entered correctly to guarantee seamless transaction deposits. This step also allows you to include any additional information relevant to your setup.
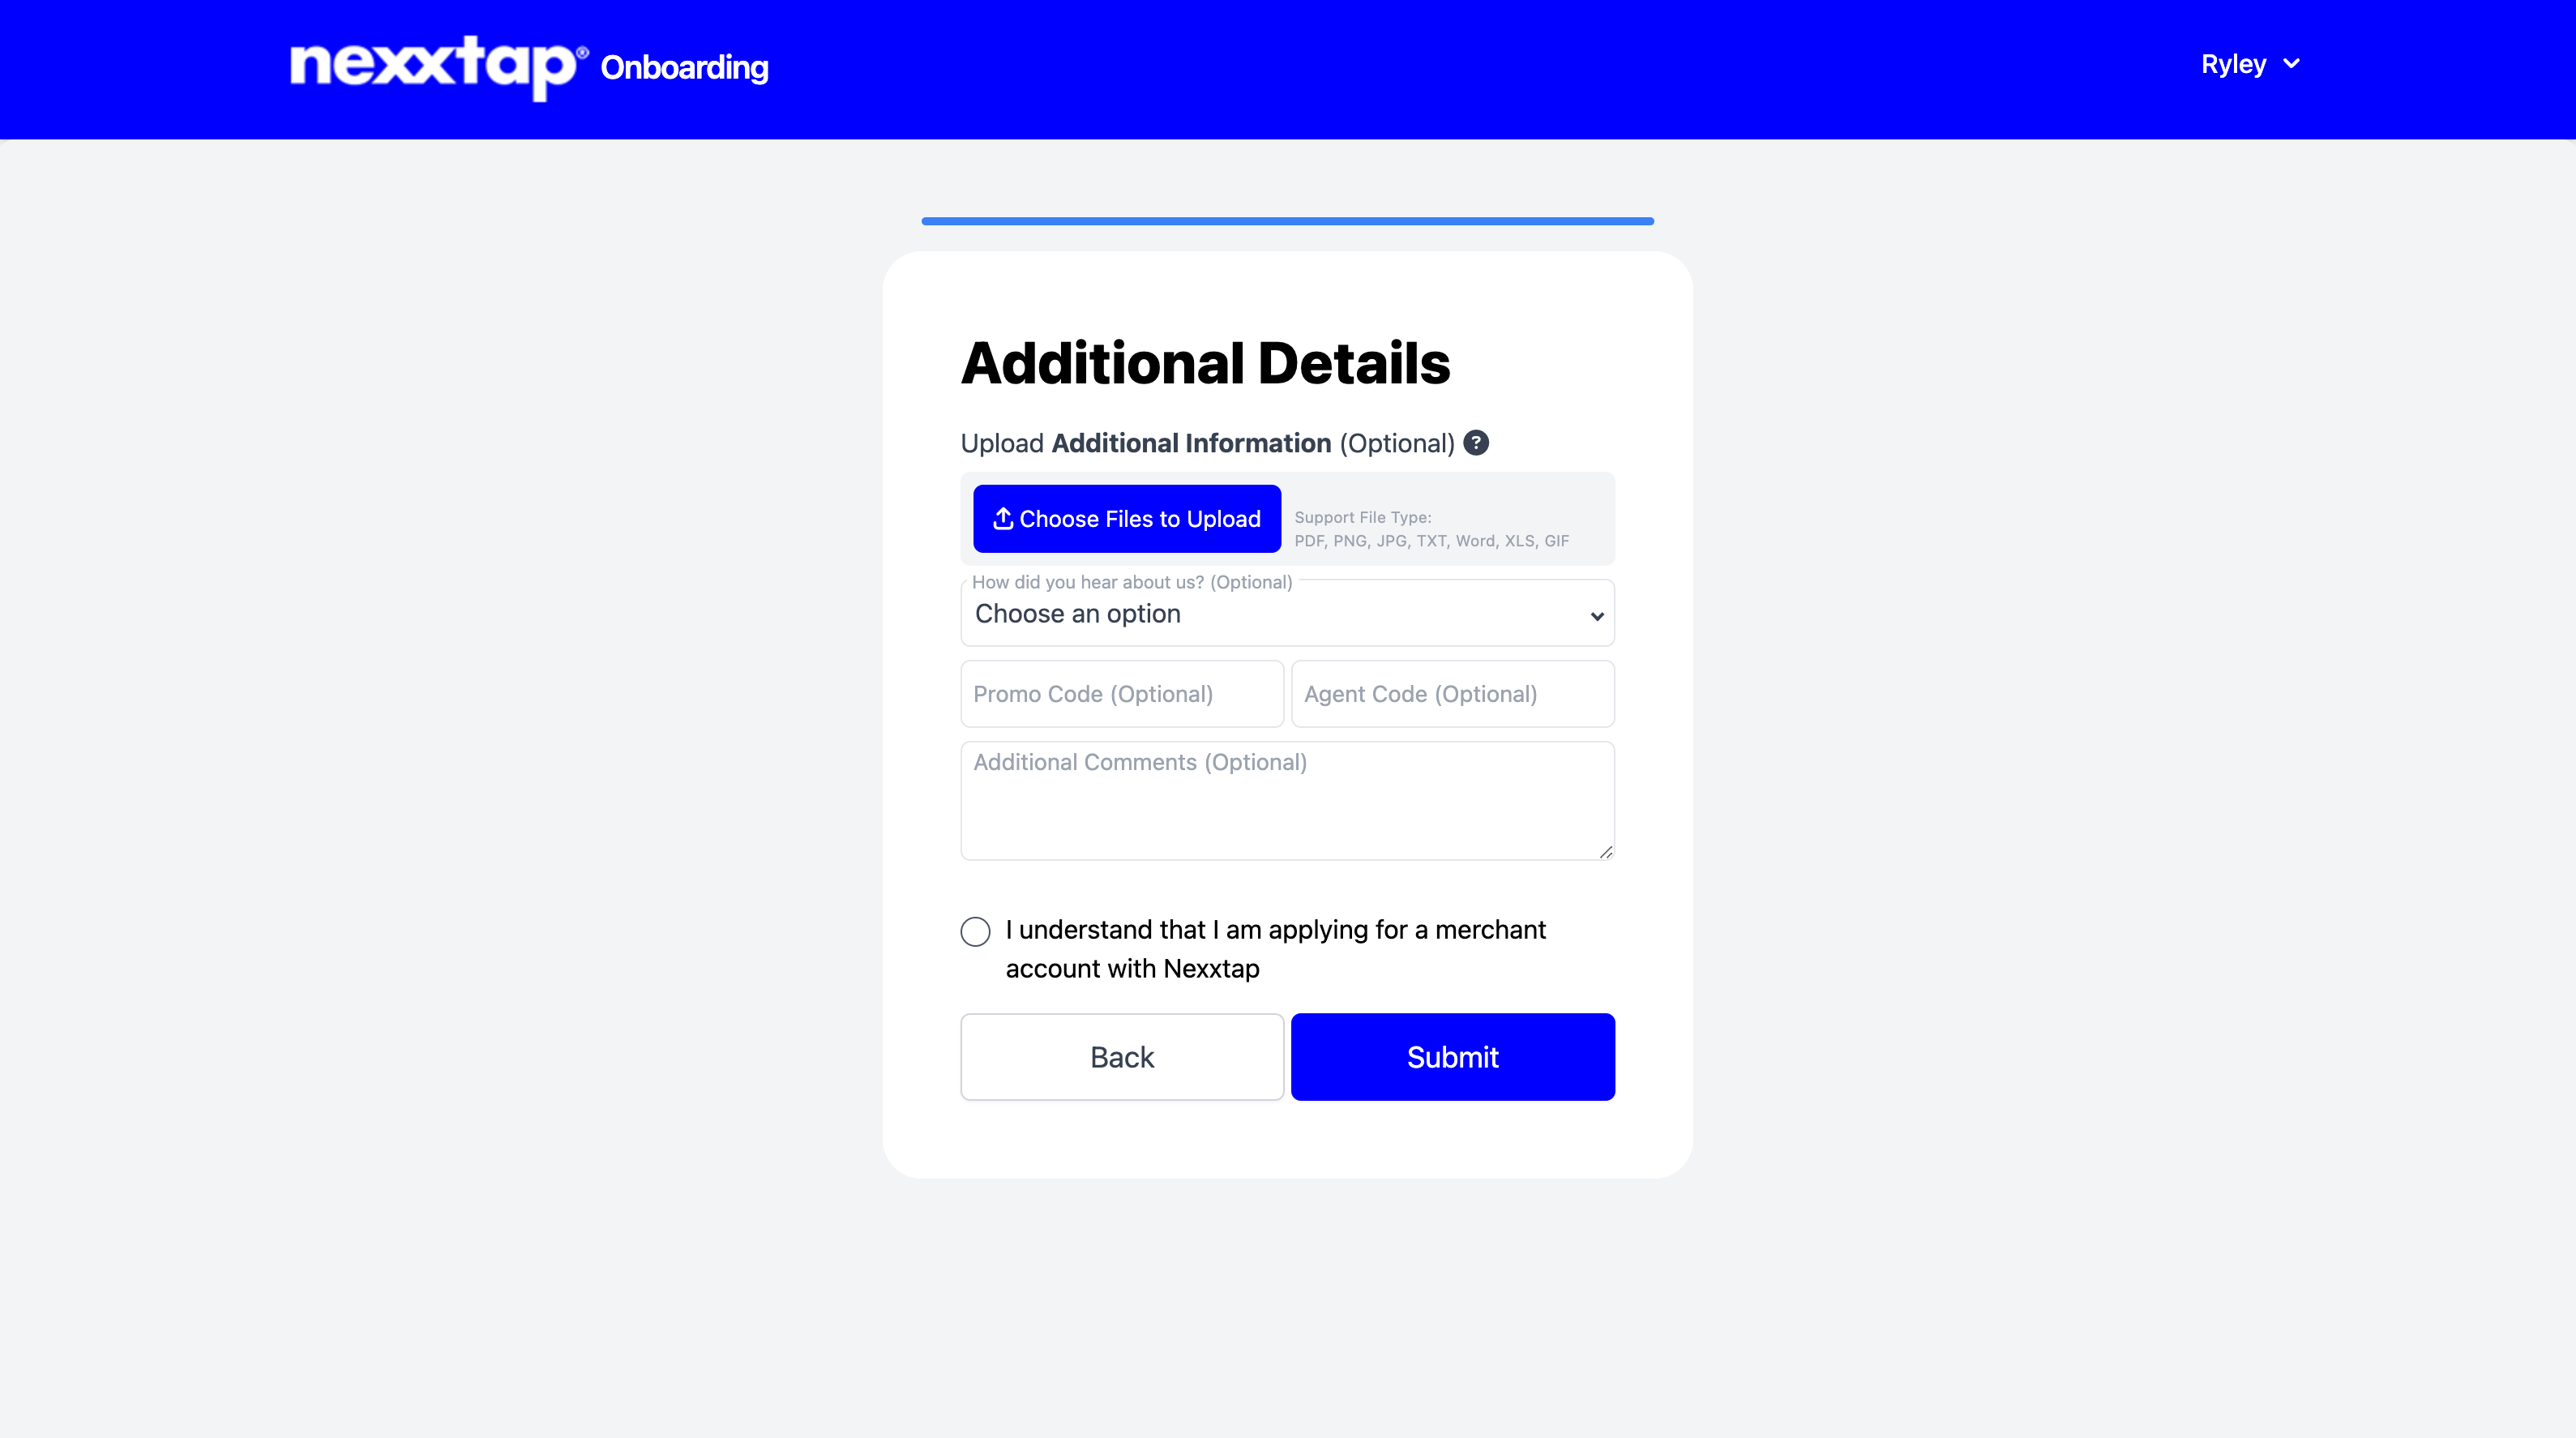
Step 10: Submit and Download the Nexxtap App (if you haven't already)
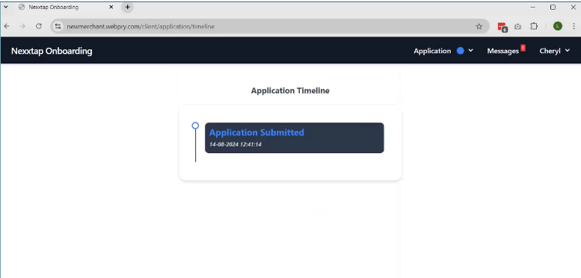
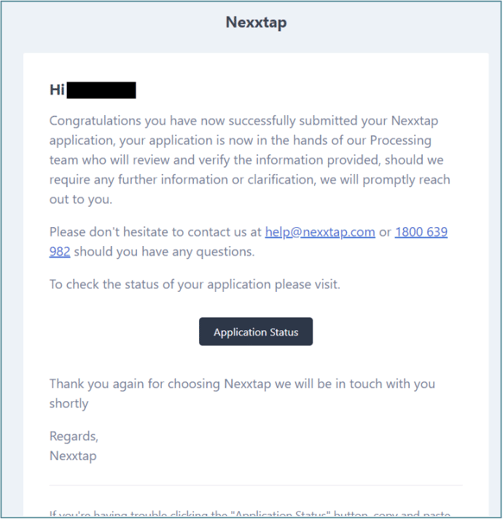
- After submission, you will be redirected to the home page of your Nexxtap account.
- Here, you can monitor the Application Status and check the Messages section for any further information or requests.
- Please allow 24-48 hours for your application to be reviewed and approved.
- Once approved, download the Nexxtap app from the Google Play Store.
- Log in using your registered credentials.
- You’re now all set to start accepting payments through your mobile device.
- Transactions processed will be deposited into your nominated bank account by the next business day.
-1.png?width=1080&height=566&name=Untitled%20(9)-1.png)
Managing Users and Permissions on Multiple Devices
Nexxtap makes it easy to manage user permissions, making it ideal for businesses with multiple staff members. To add or remove users, navigate to the 'User Management' section in the app and follow the prompts to add a new user with specific permissions or remove an existing one.
You can also set up Nexxtap on multiple devices, allowing your staff to access the app from their own devices. This flexibility ensures that everyone in your organisation can perform their roles efficiently while maintaining control over sensitive financial information.
Need extra support?
For the video version or the onboarding process, click this link
If you encounter any issues or need additional assistance while setting up your Nexxtap account, our support team is here to help. You can email us at Support@nexxtap.com or visit the Nexxtap website for detailed tutorials and FAQs.
Our support team is dedicated to ensuring that your transition to Nexxtap is smooth and hassle-free. Don’t hesitate to contact us for any questions or concerns you may have during the setup process.
